
A detailed guide to developing workflows that automate task execution across resources
A Step-by-Step Guide to Developing Workflows
Welcome to the tutorial on developing workflows using the Parallel Works platform. Workflows are a powerful means of automating task execution across the array of resources available in your account. This tutorial aims to provide you with a solid foundation to craft more advanced workflows effortlessly.
Throughout this guide, you will walk through the process of creating a straightforward workflow example that executes a user-specified Bash command on a designated resource. The workflow's code corresponds to the initial example in the workflow tutorial repository, enabling you to follow along seamlessly.
Let's get started and unlock the full potential of workflow development!
Adding a New Workflow
Head over to the Workflows page and locate the +Add Workflow button, as depicted in the screenshot below:
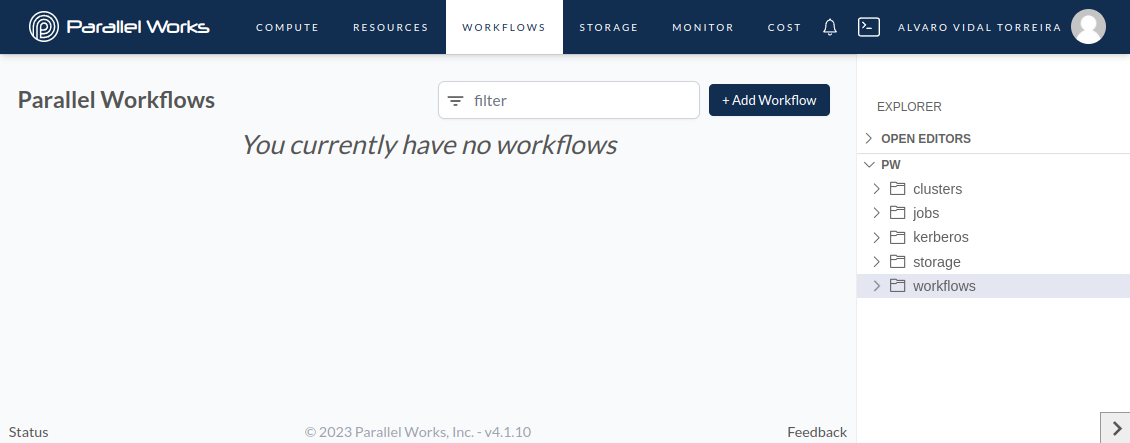 Adding a new workflow
After clicking +Add Workflow, you'll be directed to the workflow's properties page, enabling you to define essential details:
- Give your workflow a meaningful name.
- Provide a brief but informative description of its purpose.
- Enhance discoverability by adding relevant, comma-separated tags.
- Customize the workflow's appearance by dragging and dropping a suitable thumbnail.
- On the right-hand side, select the appropriate workflow type.
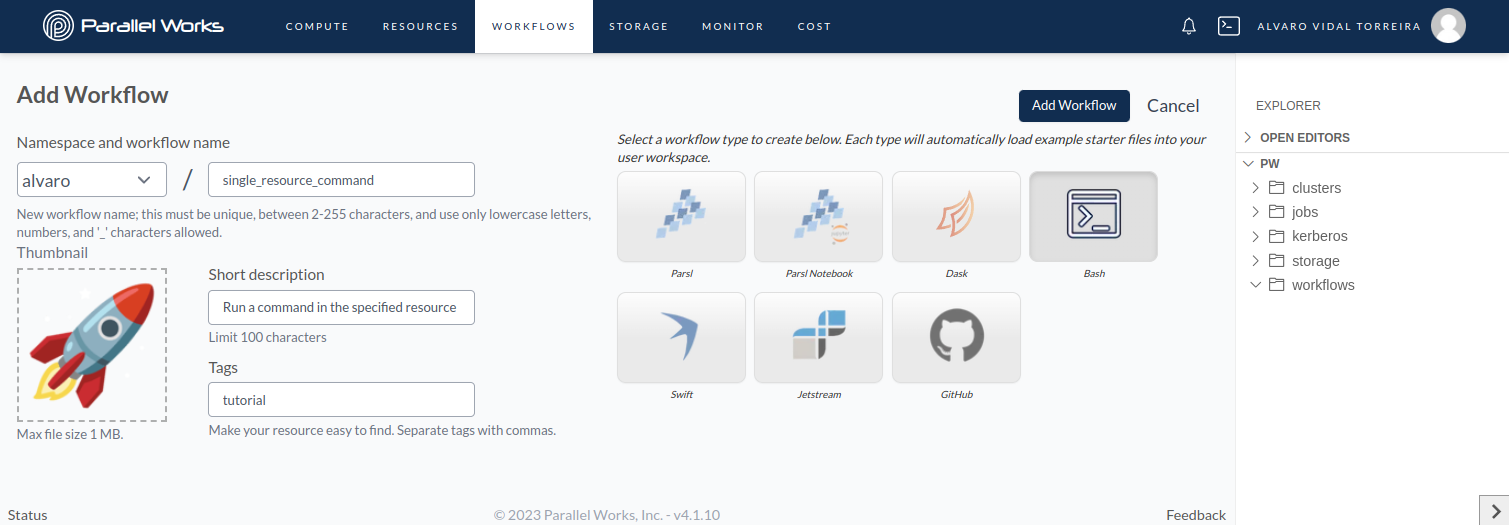 Defining the workflow properties
Once you've entered this information, simply click on Add Workflow. This action will not only add the new workflow to your account but also create a dedicated directory at /pw/workflows/<workflow-name>/, which will contain placeholder sample files for your workflow.
Configuring the Workflow
The workflow.xml file is a crucial component in the workflow execution process, serving three main purposes:
- Defining Workflow Execution: It instructs the platform on how to execute the workflow by specifying the command item. In this example, the workflow is executed using
bash main.sh. - Interactive Input Form: The file also defines the input form, allowing users to specify parameter values for the workflow at runtime.
- Workflow Parameters Specification: By utilizing the inputs item, various workflow input parameters can be defined as param items.
Each param item acts as a configurable variable, and the following key-value pairs are essential:
nameuniquely identifies the parameter and is used to access its corresponding value within the workflow.labelhelps users identify the parameter in the input form.typespecifies the data type of the parameter.help(optional) provides additional information about each parameter's functionality through a pop-up text box displayed next to the parameter name when users hover over a question mark icon.
Now, let's take a look at the workflow.xml used in this example and shown in the screenshot below:
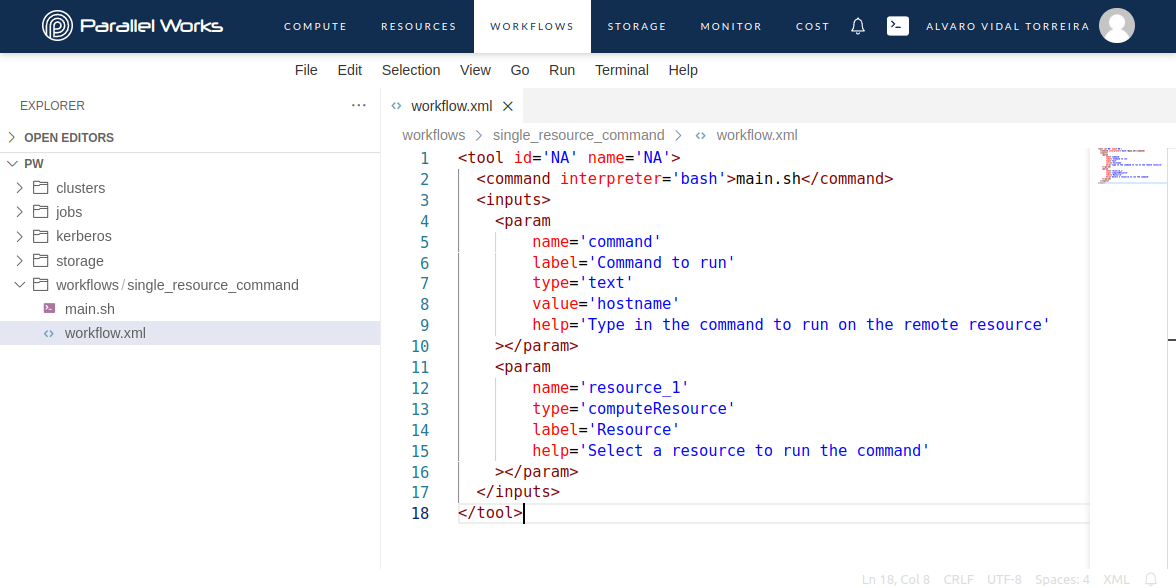 Configure the workflow using the XML file
In this example, the workflow.xml file demonstrates a workflow with two parameters: command and resource_1. The command parameter allows users to input a custom command to execute on the specified resource. Its default value is set to hostname, which prints the hostname of the node. The resource_1 parameter enables users to select any active resource from their account.
Check out the screenshot below to see how the resulting input form looks:
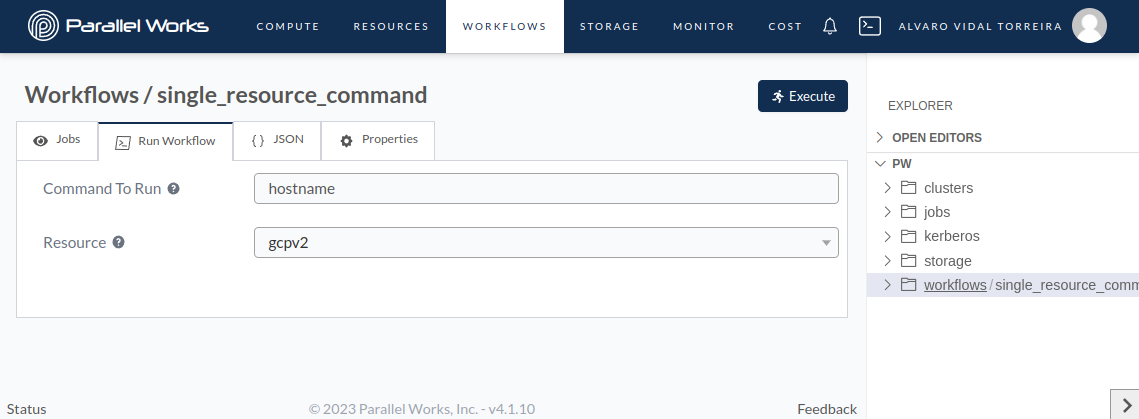 The input form allows users to interactively input the desired values for the workflow parameters before execution.
Coding the Workflow
In addition to the workflow.xml, you may include any other files or scripts required for the workflow's execution. This workflow is executed by running bash main.sh, as defined in the workflow.xml file. Therefore, it requires a main.sh file, which is shown in the screenshot below:
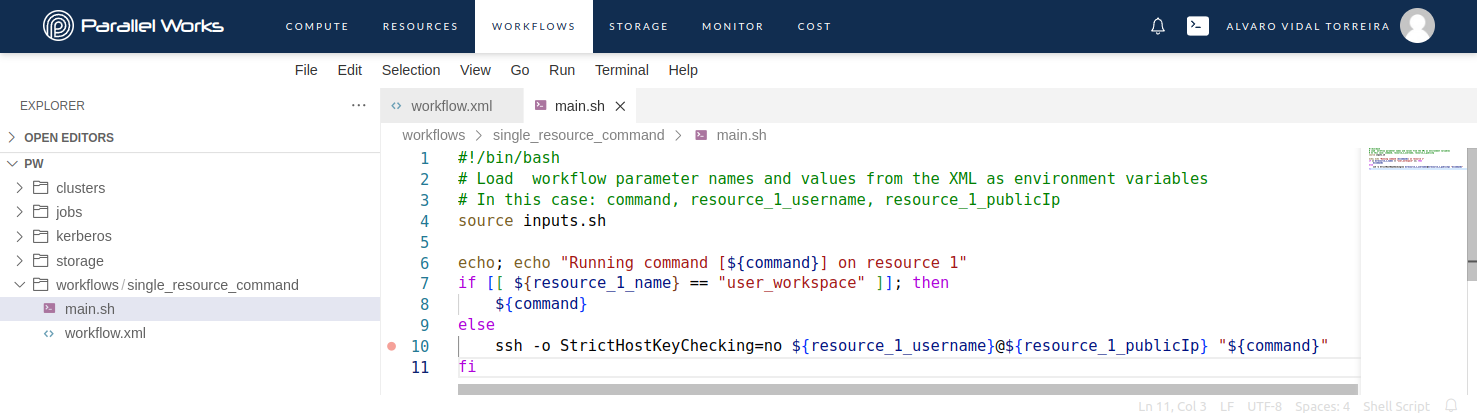 Create scripts to define the workflow code.
This script loads the input parameters as environment variables and proceeds to execute the specified command either directly in your user space or in the controller of the cluster resource using SSH, depending on whether the specified resource is the user space or a cluster.
Running the Workflow
To execute the workflow, navigate to the Compute page and ensure that your resource is activated, and the controller or login node of the cluster is connected to the platform, as indicated by the solid green bar in the screenshot below:
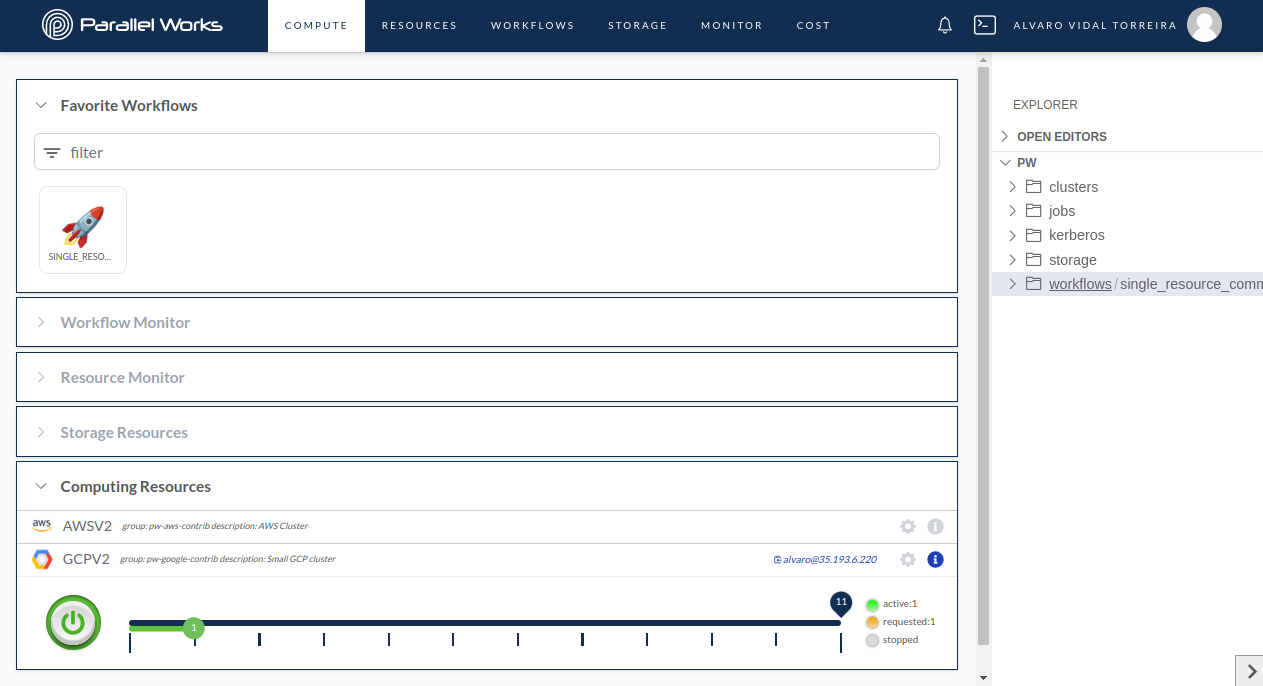 Use the Compute page to start the resource and launch the workflow.
Clicking on the workflow card redirects the user to the workflow's input form. Please note that the input form is also accessible in the Workflows page by clicking on the specific workflow and then navigating to the Run Workflow tab. For this job, the hostname command is launched on the GCPV2 resource, which corresponds to a SLURM cluster in the Google Cloud Platform. To run the workflow, simply click the Execute button.
When a workflow is executed, the user is redirected to the Jobs tab, as shown in the first screenshot below. This tab displays a table containing all the jobs corresponding to the workflow. Each row in the table contains the job number or ID, the workflow's name, the job status (Running, Completed, Cancelled, or Error), the submission date, the runtime, and three buttons. From left to right, these buttons allow you to cancel the job (), rerun a previous job (), and view the interactive display (). For more detailed information about these buttons and their functionalities, please visit this page of our user guide.
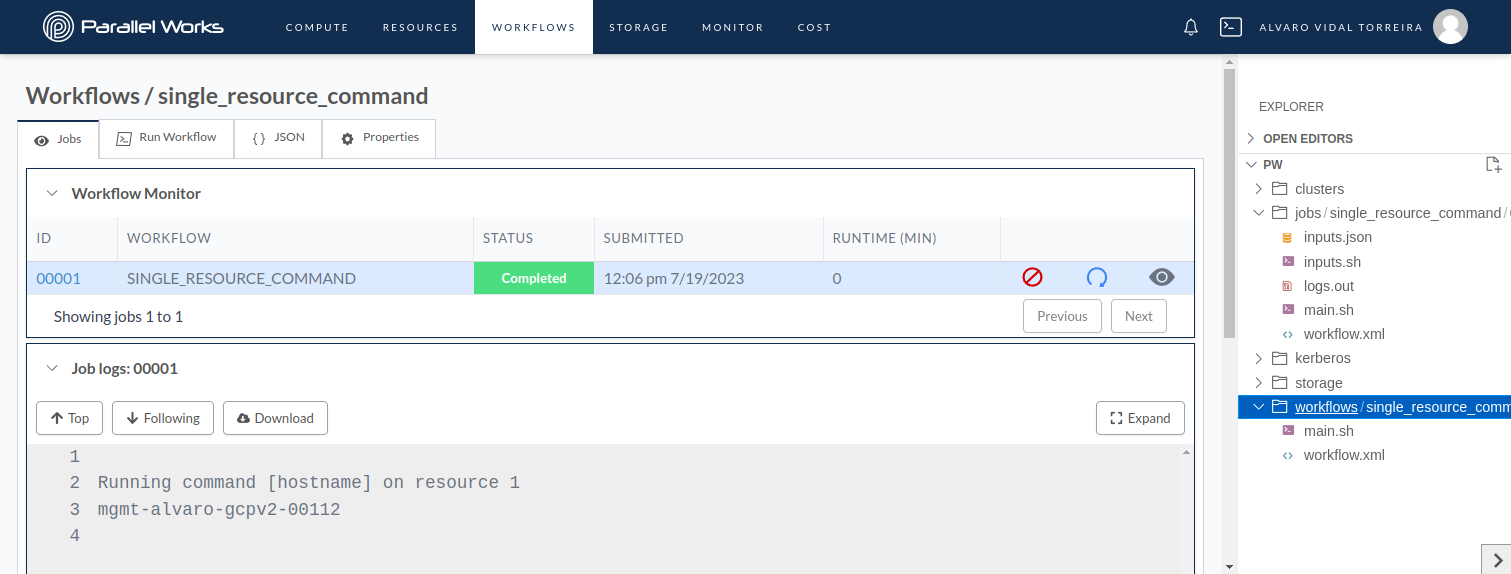 Jobs tab showing the job information.
Upon executing the workflow, the workflow files are copied from the workflow's directory located at /pw/workflows/<workflow-name>/ to the job's directory under /pw/jobs/<workflow-name>/<job-number>. Subsequently, the platform generates two files: inputs.json and inputs.sh. These files include the workflow's input parameter names defined in the workflow.xml file and the corresponding input parameter values provided in the input form. It is important to note that the platform adds useful information corresponding to the selected resource, such as the username and public IP address of the controller node. Both of these pieces of information are used in the main.sh script to submit the command.
Both inputs.json and inputs.sh contain the same information but are formatted differently to facilitate the loading of inputs. Specifically, inputs.sh contains a flattened version of the inputs.json. The screenshot below illustrates the contents of these files for reference.
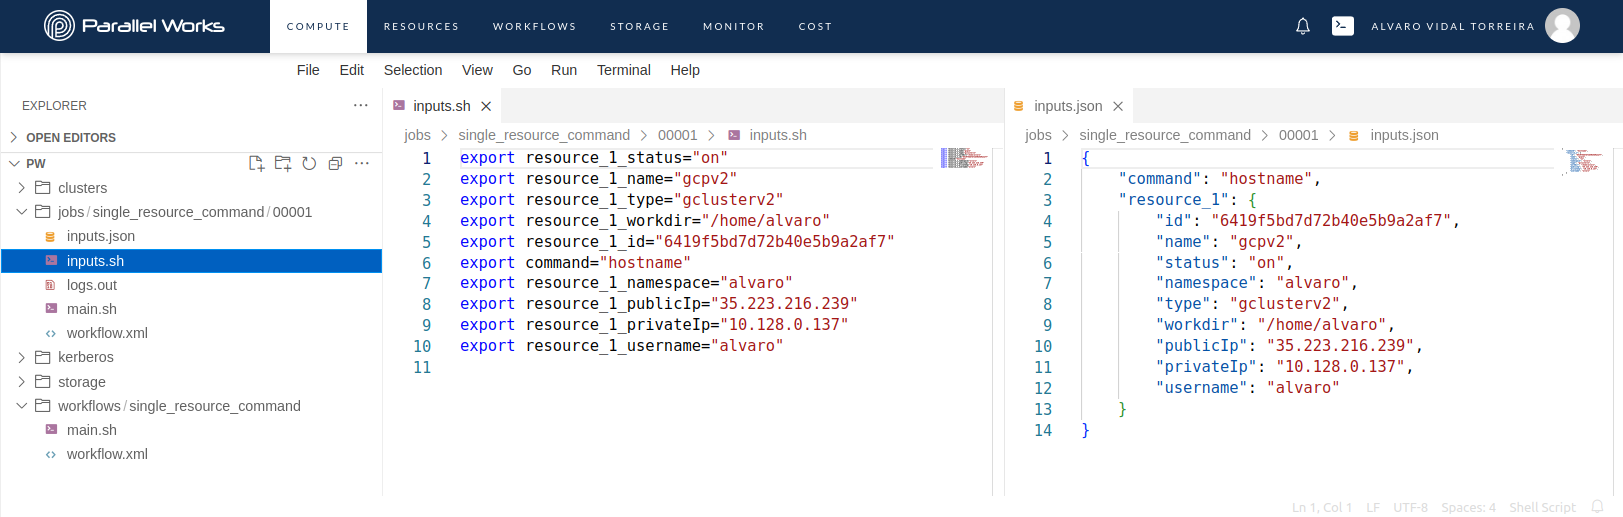
Jobs directory and files
Finally, the workflow is executed from the job's directory by running the command bash main.sh, as specified in the workflow.xml file. During the execution, the standard output and error are redirected and saved into the logs.out file.
It is worth noting that the workflow can be manually re-launched from a terminal in the user space by navigating to the job directory and re-running the bash main.sh command, allowing for greater flexibility and control. The accompanying screenshot below provides a visual representation of this process.
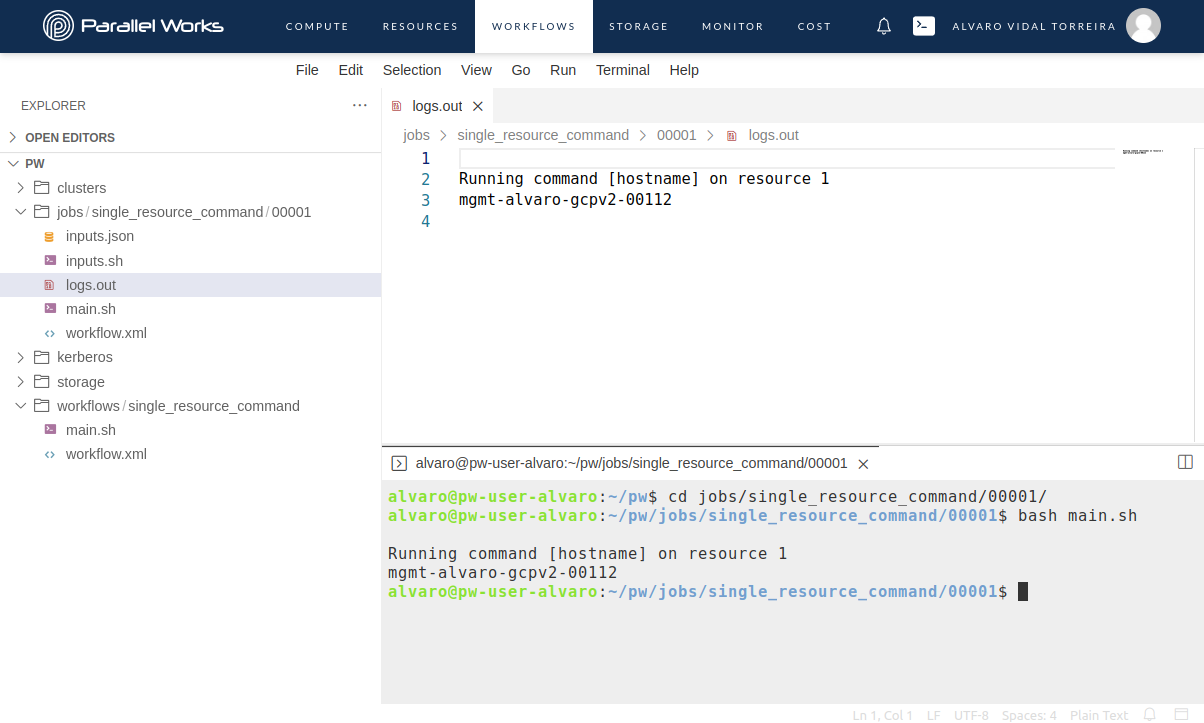 Manually re-running the job from the terminal
Conclusion
In this step-by-step guide, you've learned how to develop workflows using the Parallel Works platform, enabling you to automate task execution across various resources effortlessly. By defining workflow properties, configuring the workflow using the workflow.xml file, and coding the workflow, you gained insights into creating customized and powerful workflows tailored to your specific needs.
The Parallel Works platform offers a seamless workflow development experience, providing users with an intuitive interface to create, run, and manage their workflows efficiently. With the ability to execute workflows across diverse resources, you can optimize your computational tasks and accelerate your projects.
As you continue exploring workflow development, you'll find numerous possibilities for automating complex processes, optimizing resource utilization, and unlocking the full potential of your computational resources.
So, unleash your creativity, build innovative workflows, and make the most out of Parallel Works' capabilities to streamline your computational tasks and drive scientific discovery. Happy workflow building!