About Interactive Sessions
Parallel Works publishes a set of workflows called interactive sessions which makes it easy to get started with many interactive applications on ACTIVATE. These workflows are available on the ACTIVATE Marketplace and their source code is publicly available on GitHub.
Just need a desktop on a controller?
If you only need a graphical desktop on a cluster controller (head node) or your user workspace, use a Desktop session instead. Desktop sessions launch directly through the ACTIVATE agent, which is more reliable and general than the workflow-based approach. Interactive sessions remain the best way to launch a desktop — or apps like MATLAB and RStudio — on compute nodes, where the job must go through the scheduler.
Running Interactive Sessions
You can run interactive sessions either inside your user workspace on ACTIVATE, or on any cluster's controller or compute nodes. Running an interactive session on a controller or compute node requires a running resource. If you plan to run an interactive session in your ACTIVATE user workspace, you do not have to have a resource running. In general, it’s best to only run lightweight interactive session applications in the user workspace, such as small tests or running a Jupyter Notebook that launches jobs on other resources.
If you want to practice with a sample interactive session, you can follow our Jupyter Notebook instructions or explore other interactive sessions in the Parallel Works Marketplace, especially JupyterLab, VSCode, NGINX, VNC Server, and RStudio.
To run any interactive session:
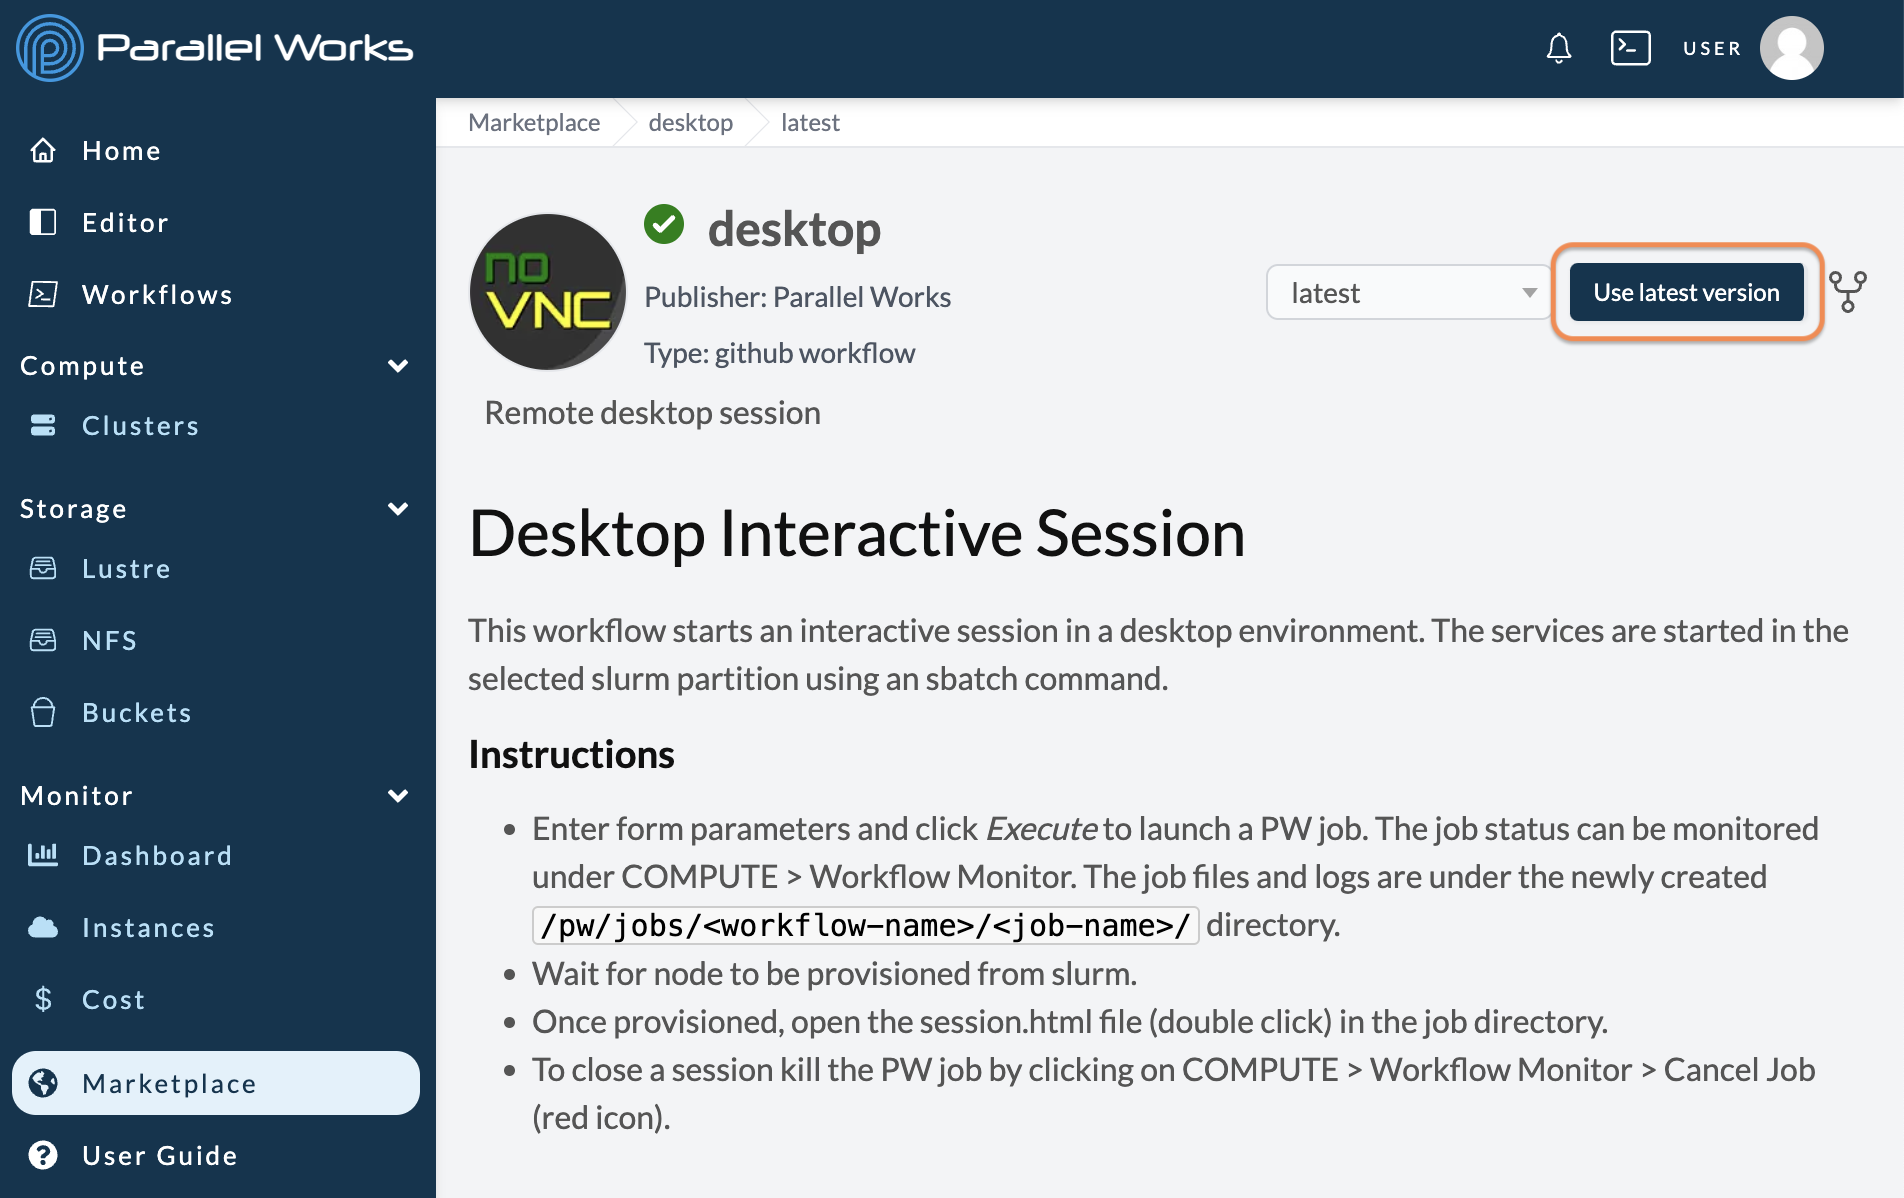
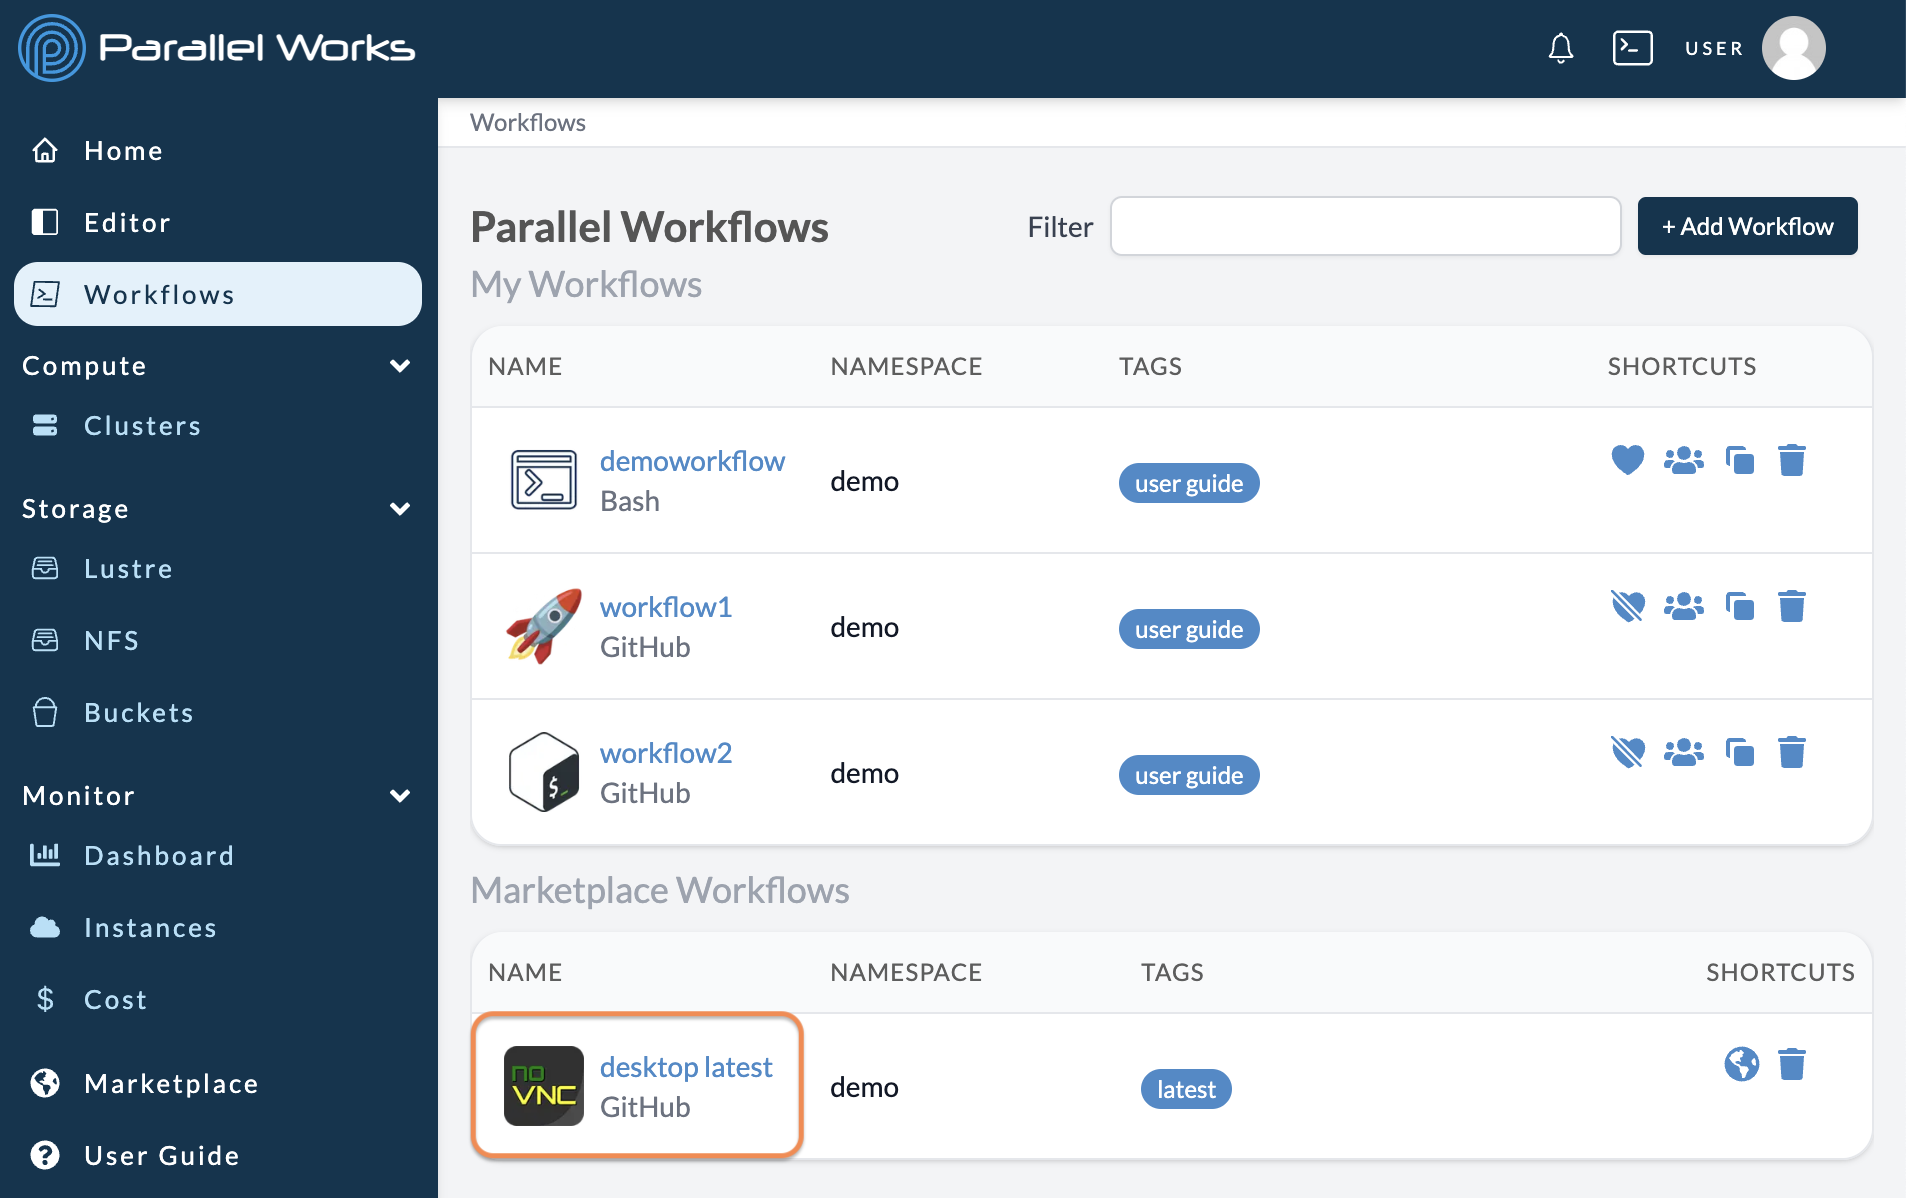
- Add the interactive session workflow you want from the ACTIVATE Marketplace. If you’re importing files from GitHub instead, we suggest building your own workflow.
-
Start your resource if you plan to run the interactive session on a controller or compute node.
-
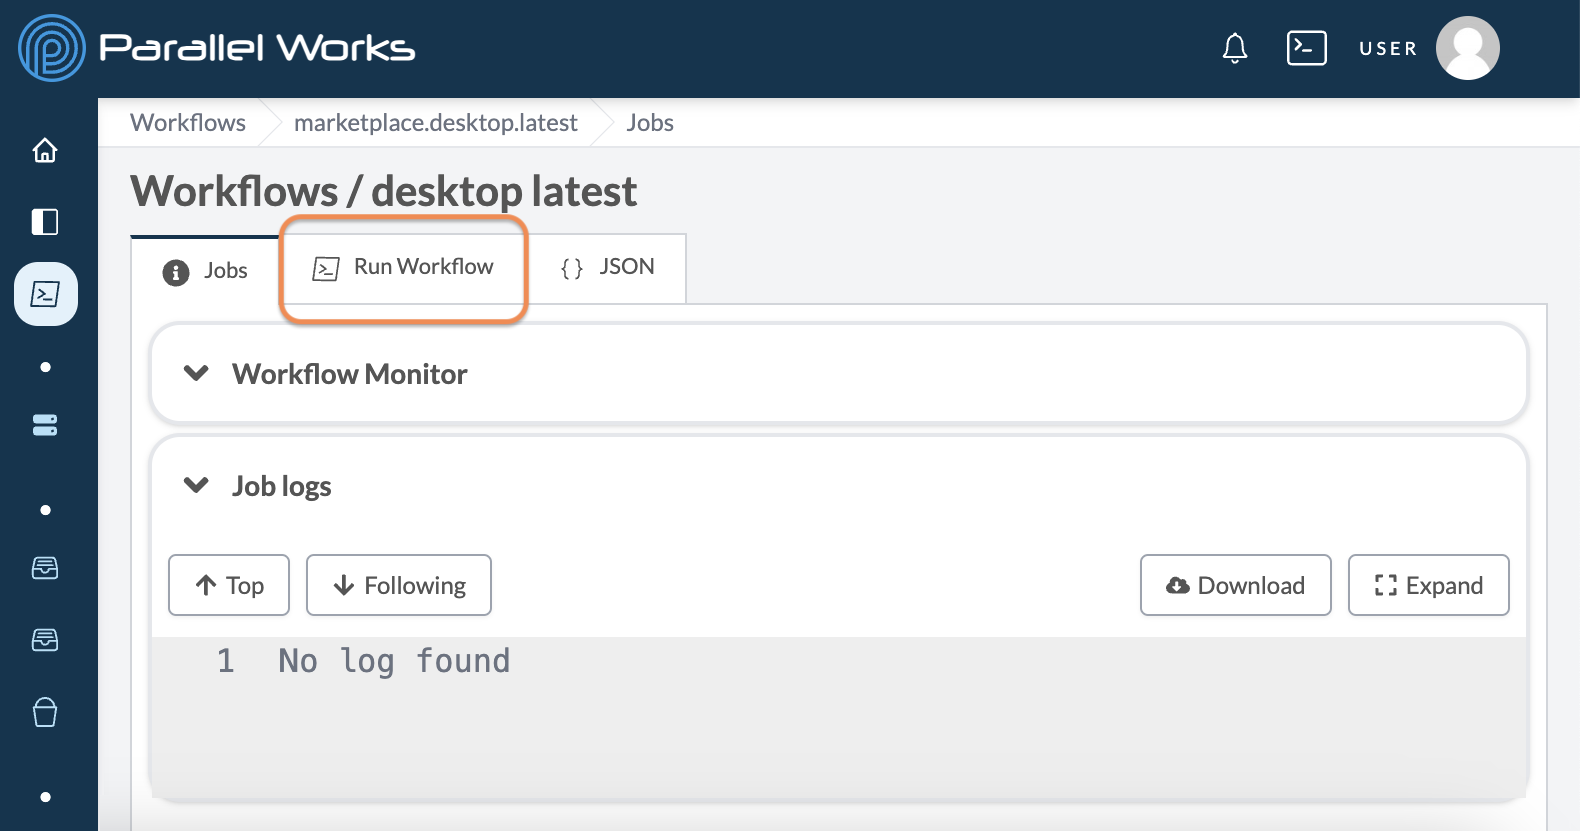
Go to Workflows > Your Workflow > Run Workflow and choose the resource where you want to start the server.
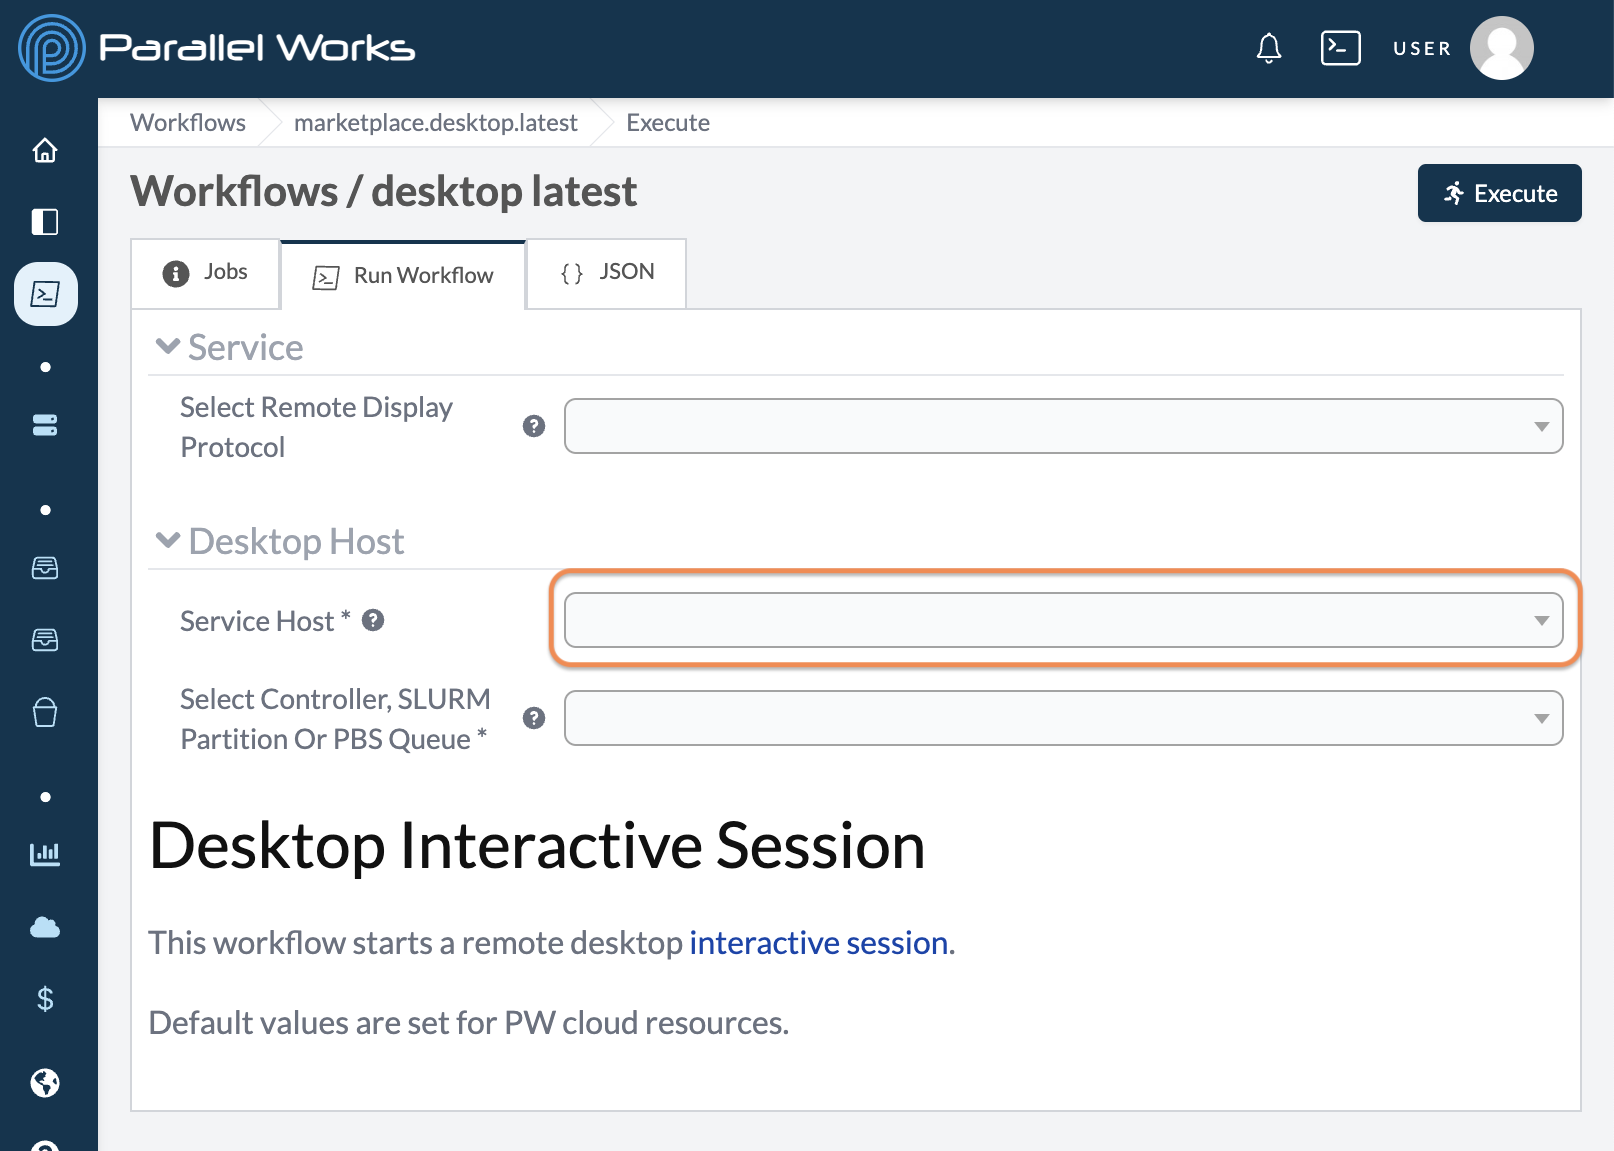
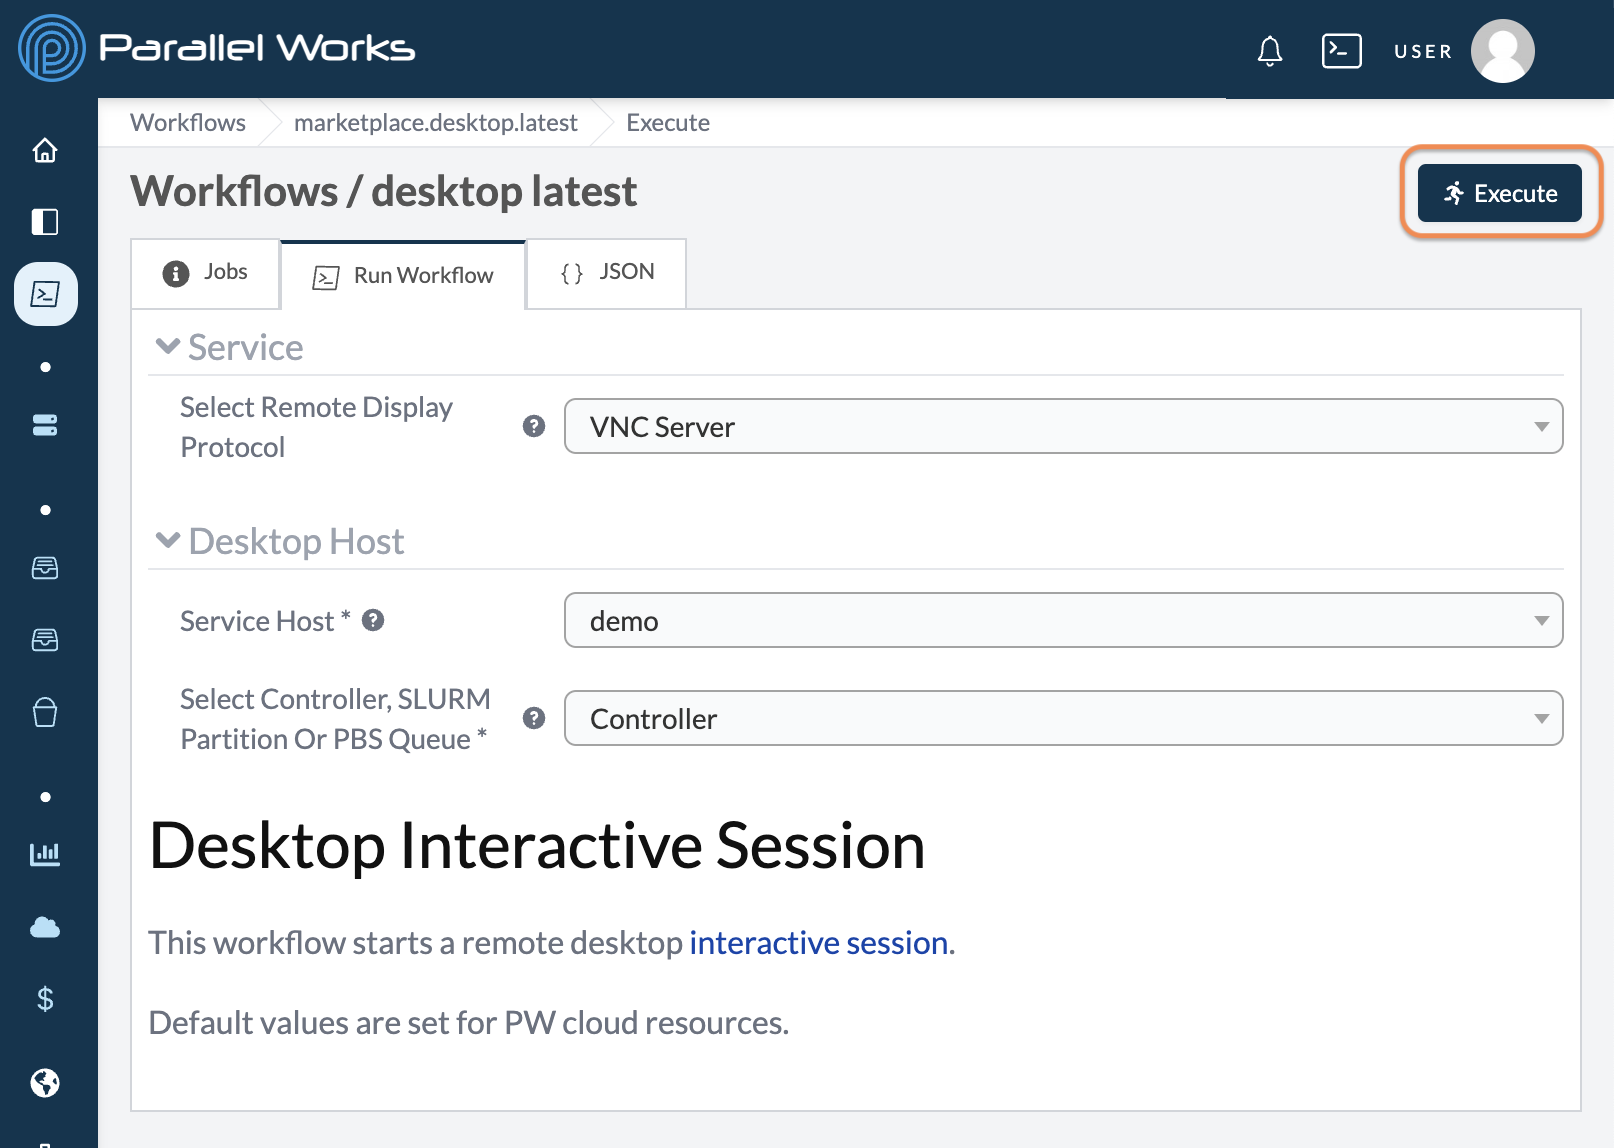
- Enter or review the other input parameters in the Run Workflow tab. You can find detailed descriptions of each parameter by hovering over the help tip icons next to their labels.
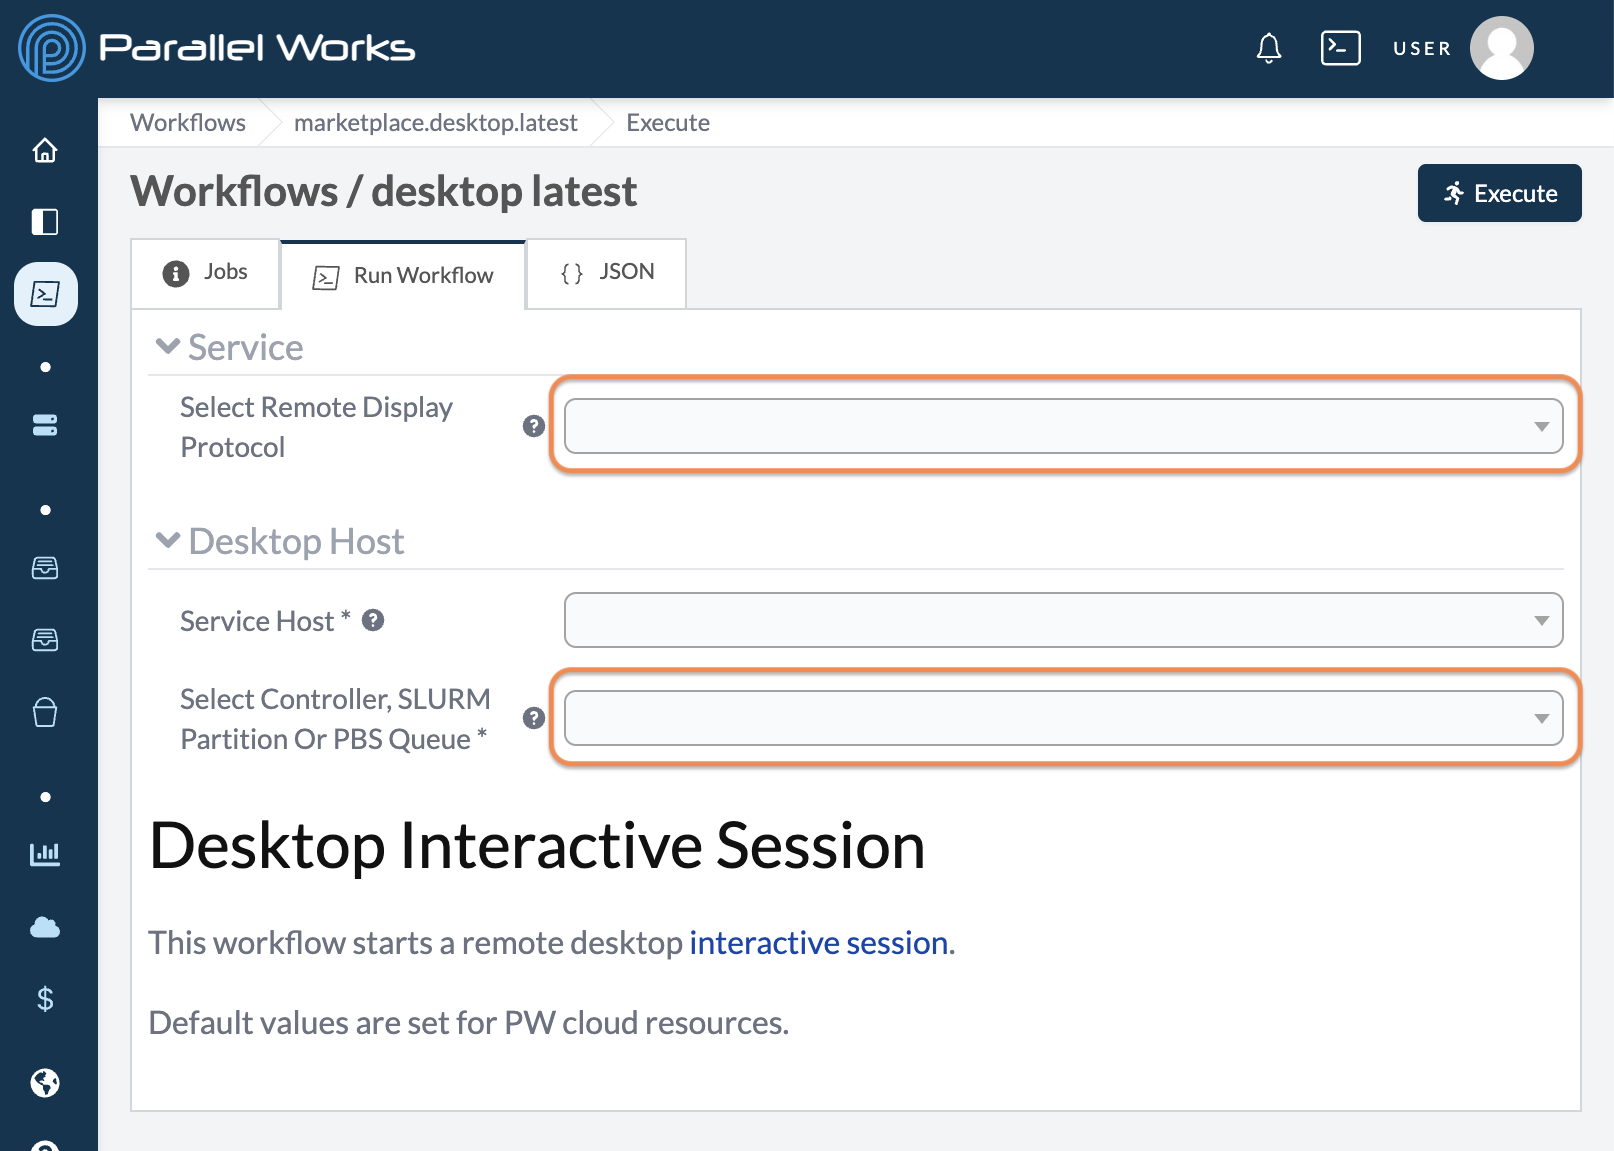
- Click the Execute button to launch the job.
- When a connection has been established and your workflow is ready to use, a notification will appear in the bell icon in the navigation bar. Please note that the connection is established only after the server is running. There may be a wait time if the job is in a queue, if compute nodes are starting, or if the job is installing required software. For more information on the job's status, you can check the Logs module.
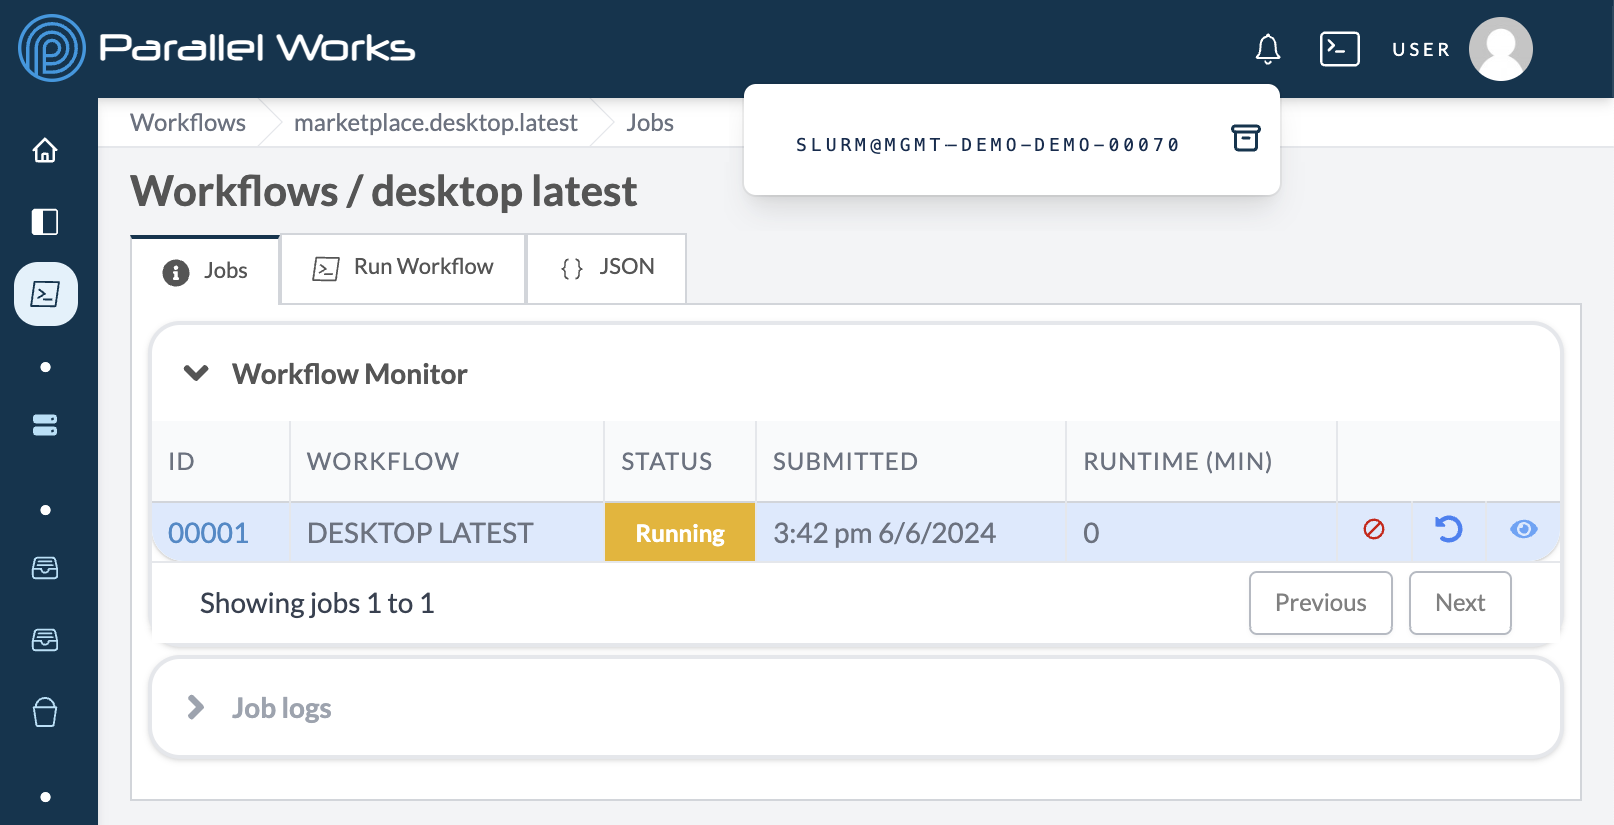
The notification is shown in the form of [Partition Type]@MGMT-[Username]-[Resource Name]-[Partition Number].
To access the server, click the View icon in the Workflow Monitor module.

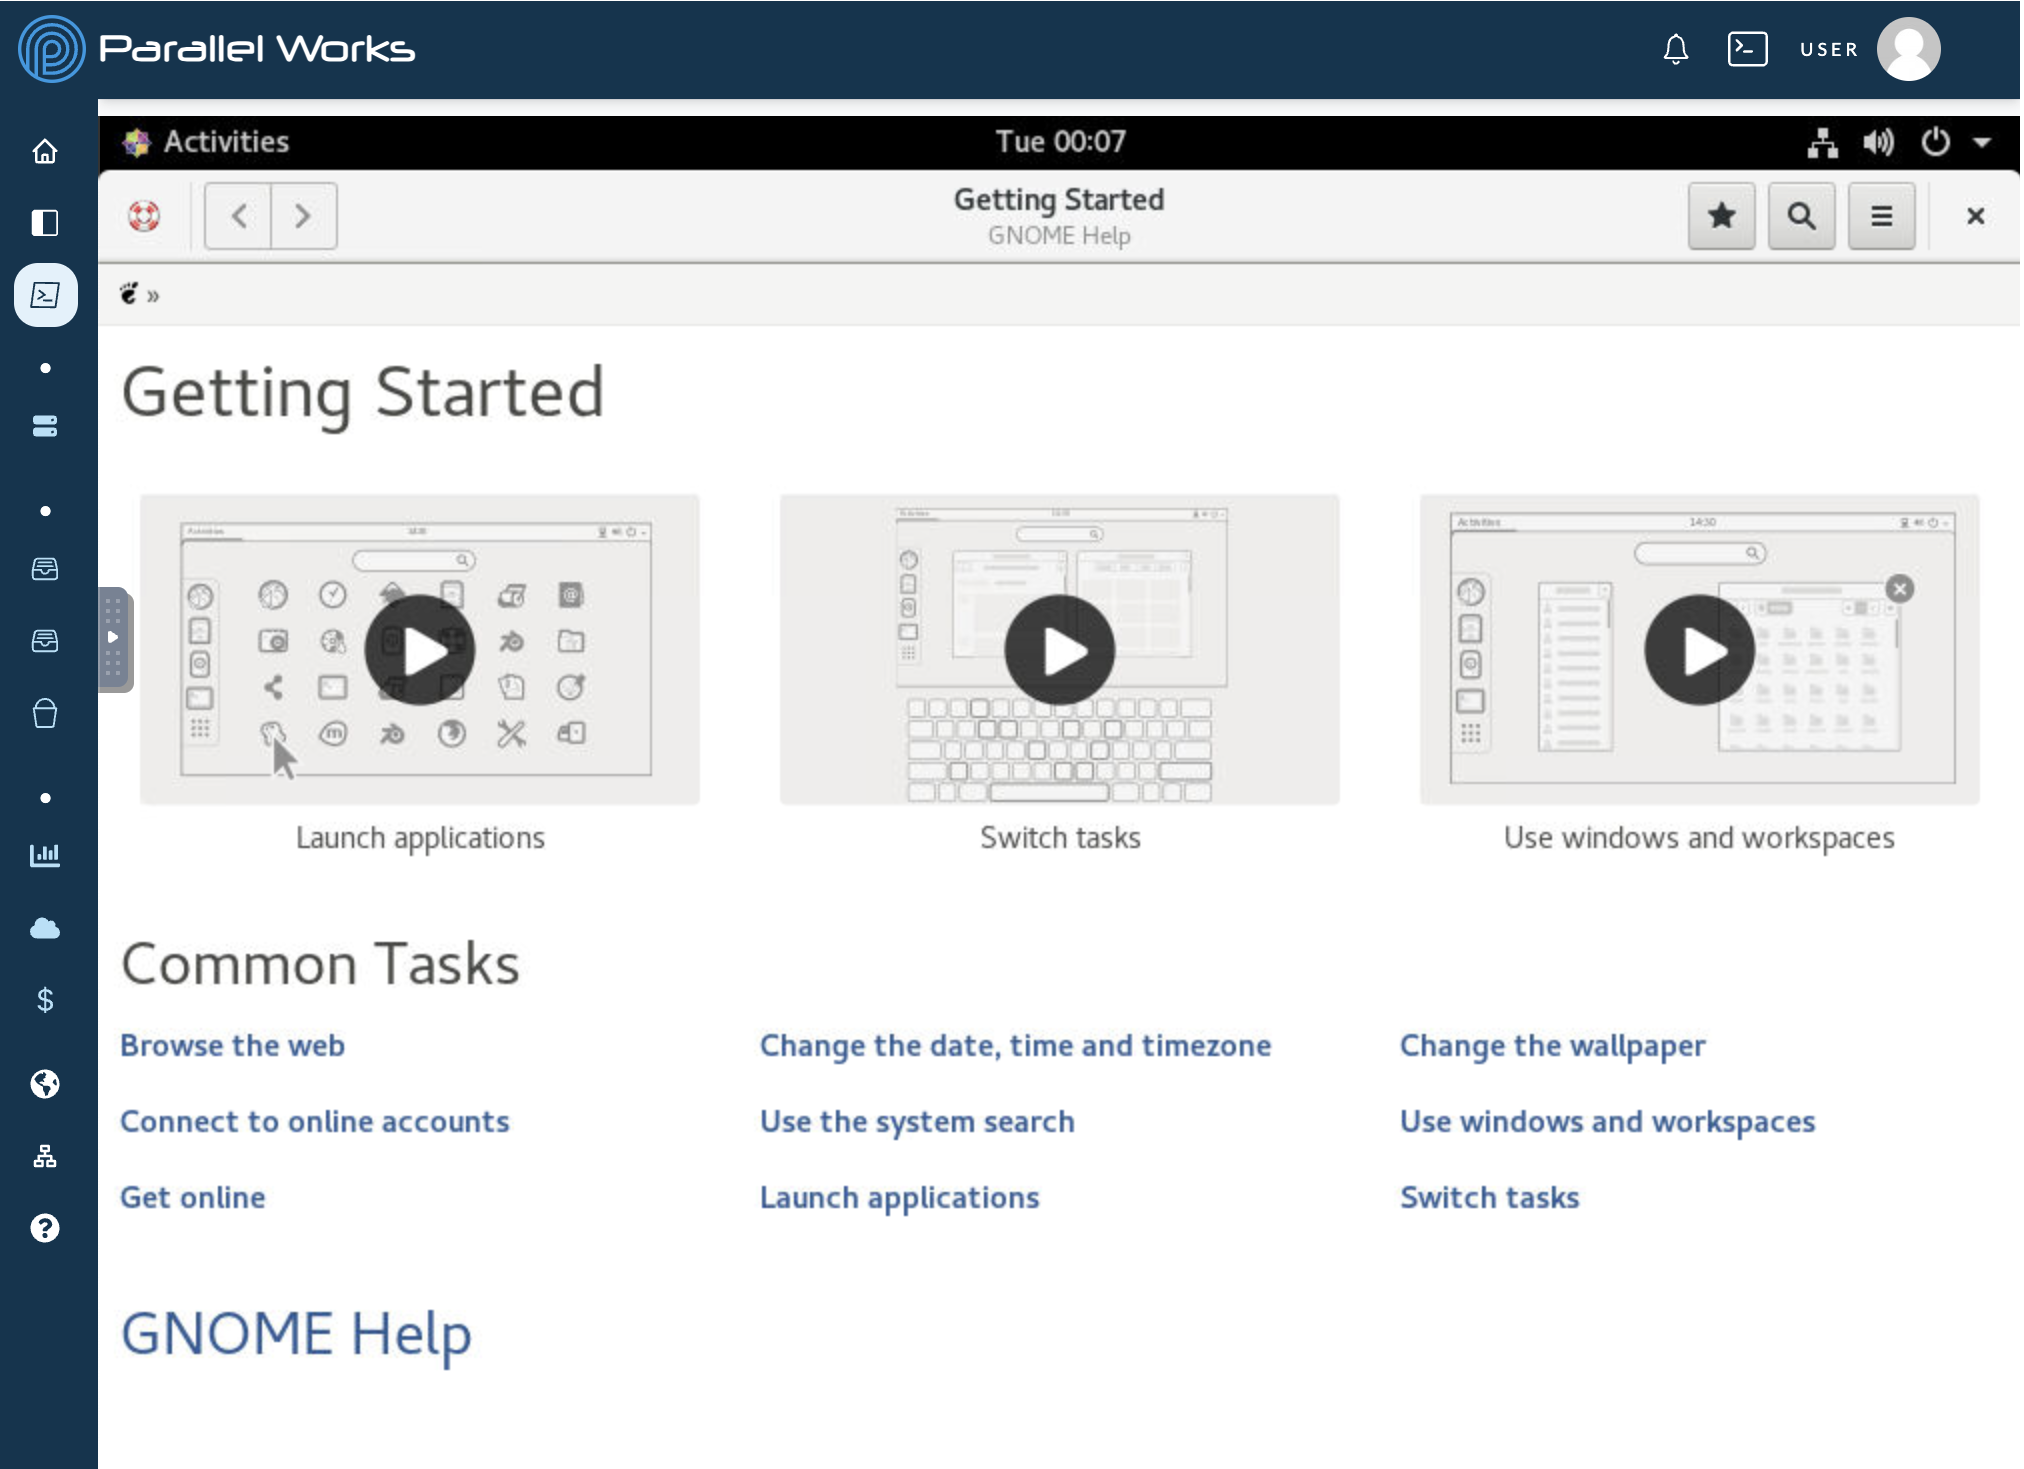
Pictured: the Desktop workflow running as an interactive session. The default desktop Getting Started window can be removed with the close box in the upper right corner to reveal a standard desktop environment. This environment is the desktop on the resource specified at the launch of the workflow (i.e. a cluster head node or worker node).
- When you’re done, click the Cancel icon to stop the job.

Developing Interactive Sessions
The rest of this page details the technical foundation for how interactive sessions work if you want to customize existing interactive sessions or develop new ones. As such, most users will be interested in the section above, while the rest of this page is most relevant to developers.
Required Files
Main Script
As we defined in Building Workflows, interactive sessions require a main script. This script is used to start and/or connect the server and start the SSH tunnel (if the server is running in the resource).
Cancel Script
Interactive sessions also require a cancel script. This script is used for clean-up tasks when the job is canceled on ACTIVATE, such as stopping the server and removing the SSH tunnel.
service.json
The service.json file contains the required information for ACTIVATE to establish a connection with the server using this URL: https://activate.parallel.works/<URL>/<PORT>/<SLUG>. Access to this URL is restricted to users who are logged in to ACTIVATE. It's important to highlight that the service.json file can be edited at any time and is typically updated during runtime.
This is an example of a sample service.json file for a Jupyter Notebook server:
{
  "URL": "/me",
  "PORT": "51458",
  "SLUG": "tree",
  "JOB_STATUS": " CANCELED ",
  "ERROR_MESSAGE": ""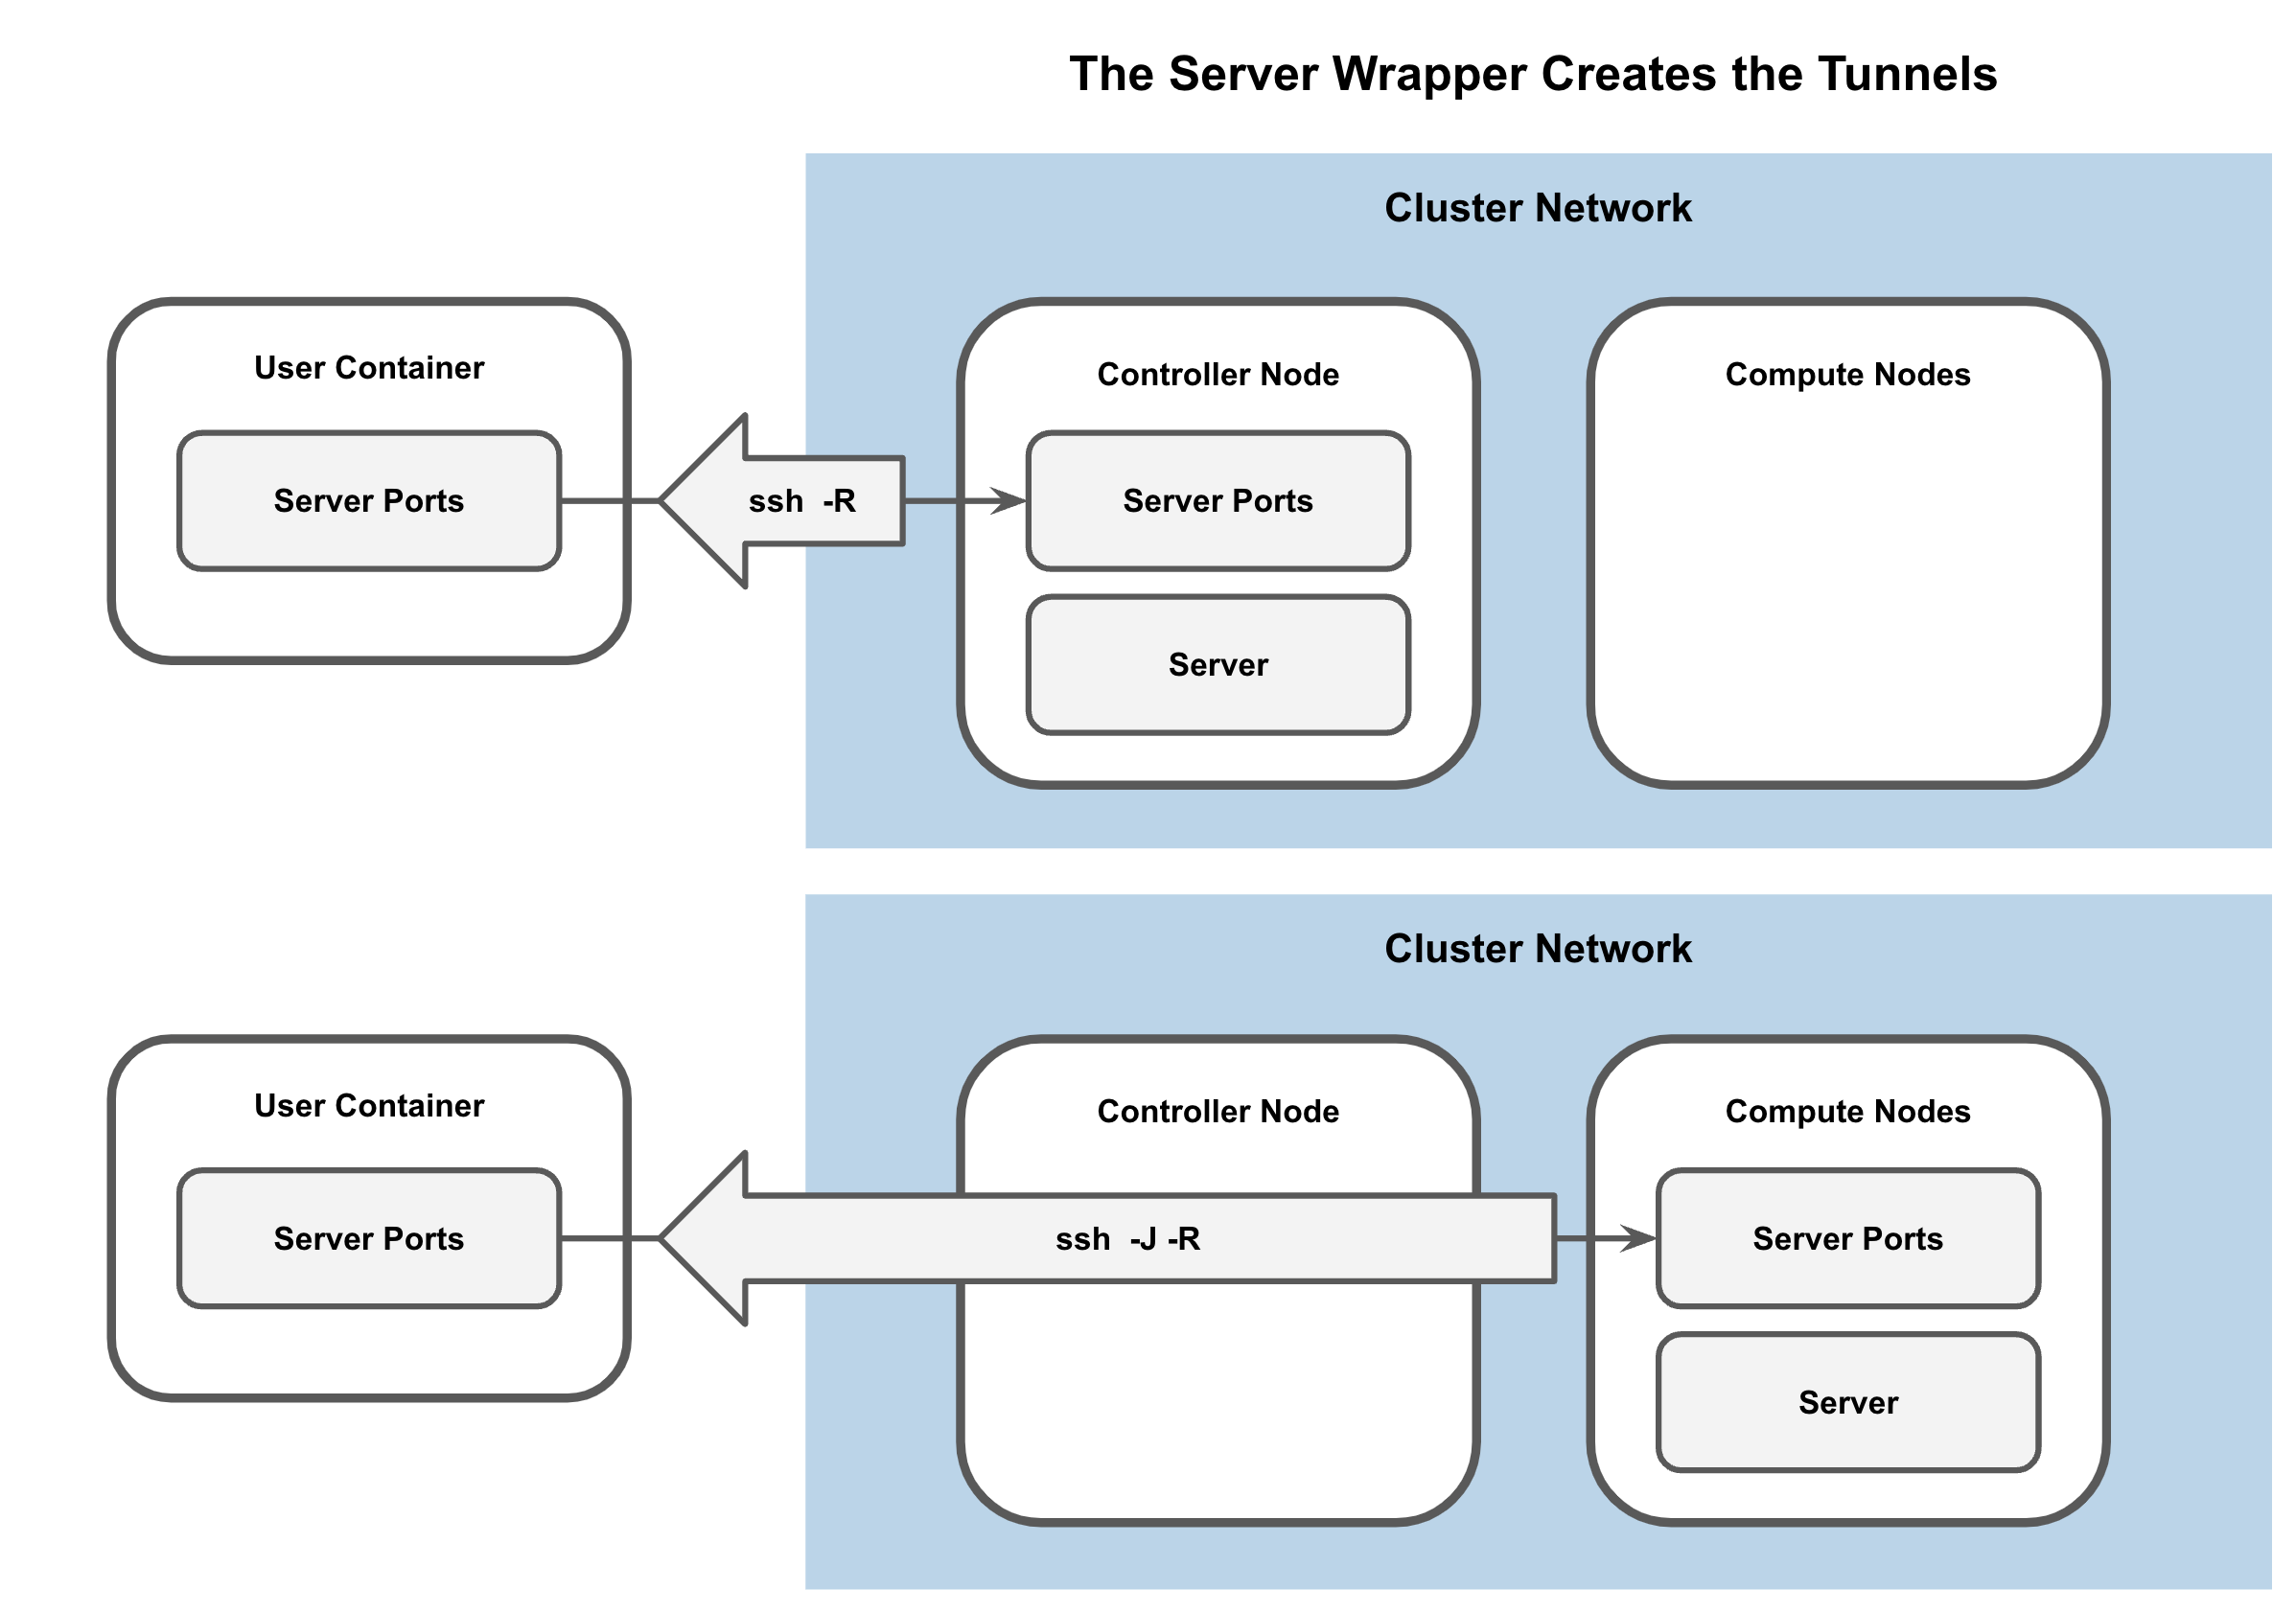
}PORTrepresents the server's port number that ACTIVATE needs to reach. If the server is within the user's workspace, this is the server's port. Otherwise, it requires establishing a reverse SSH tunnel between the remote node and the user workspace, as depicted in the accompanying image. It is recommended to dynamically select an available port.JOB_STATUSsets the status for a workflow. If the job status isrunningorr, ACTIVATE connects to the server using this URL:https://activate.parallel.works/<URL>/<PORT>/<SLUG>. In the event of afailedstatus, ACTIVATE displays the associated error message. For all other job status values, ACTIVATE shows a loading page with the corresponding status. Uppercase or lowercase letters can be used for this parameter.URLrepresents either/meor/smebased on whether the server uses the HTTP or HTTPS protocols, respectively.SLUGrepresents the end of the URL. If the server lacks aSLUG, use\"instead.ERROR_MESSAGEis a custom error message displayed on ACTIVATE if the server encounters a failure. Note that the error message is only displayed if the job status isfailed.
Customization
Workflow users can contact us to further customize existing workflows. For example, we can expose or enforce any Slurm or PBS directives, connect to existing services, change the service configuration, or start the GUI for a given software in the desktop.
Users can also develop their own interactive sessions. You can follow our developer’s guide on GitHub to add a new service or customize any existing service.
When you add a new service, please note that interactive sessions typically follow these steps:
- Generate a submit script to start the server in the user workspace and the controller and compute nodes of the cluster with the corresponding Slurm or PBS directives
- Find available ports
- Submit job to the queue
- Monitor job in the queue
- Cancel job in the cluster when the job is canceled on ACTIVATE
- Create and destroy SSH tunnel
Any of the following folders on GitHub can serve as starting points for workflow customization:
- Jupyter Notebook Server: can be started directly in the user workspace, a controller, or a compute node; uses Docker or Singularity containers in the controller or compute nodes
- Jupyter Lab: functions similarly to Jupyter Notebook Server
- VSCode
- NGINX
- MATLAB
- RStudio
- Remote desktop services:
Supported Services
Several services can be connected to ACTIVATE using the steps above. Any directory in our interactive session repository with a start_template.sh file is its own service.
Each of these services can be customized for specific scenarios. For example, one NiceDCV workflow could start a server and another could connect to an existing server. The code for each scenario would be the same, but the inputs for each job would change.
We also offer services that start remote desktop servers and launch a specific application, such as MATLAB or RStudio.