Authentication
Managing API Keys
You can use an API key to access Parallel Works via its REST API.
Note
Please note that API keys act as an alternate means to access your account and should be treated with the same care as your login password.
Create an API Key
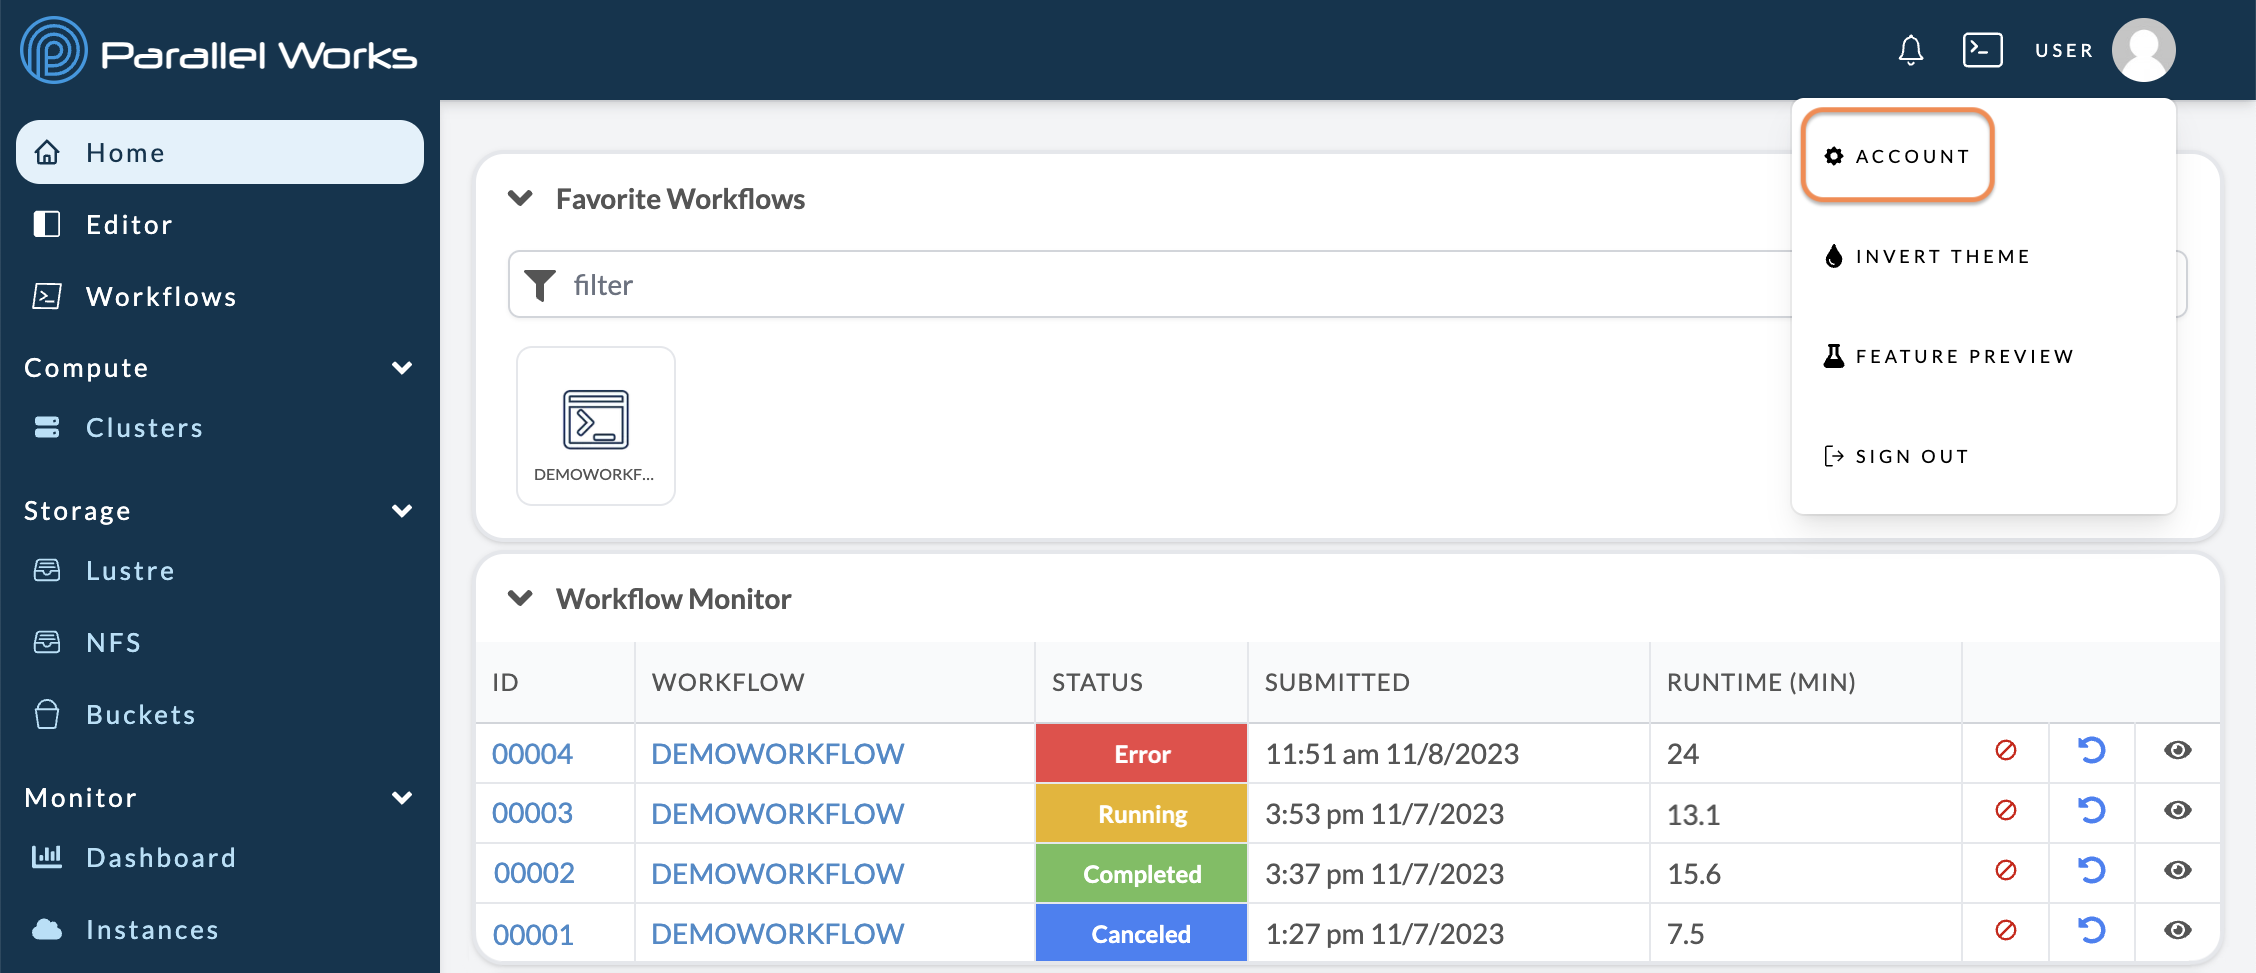
Navigate to your account settings (Username > Account).
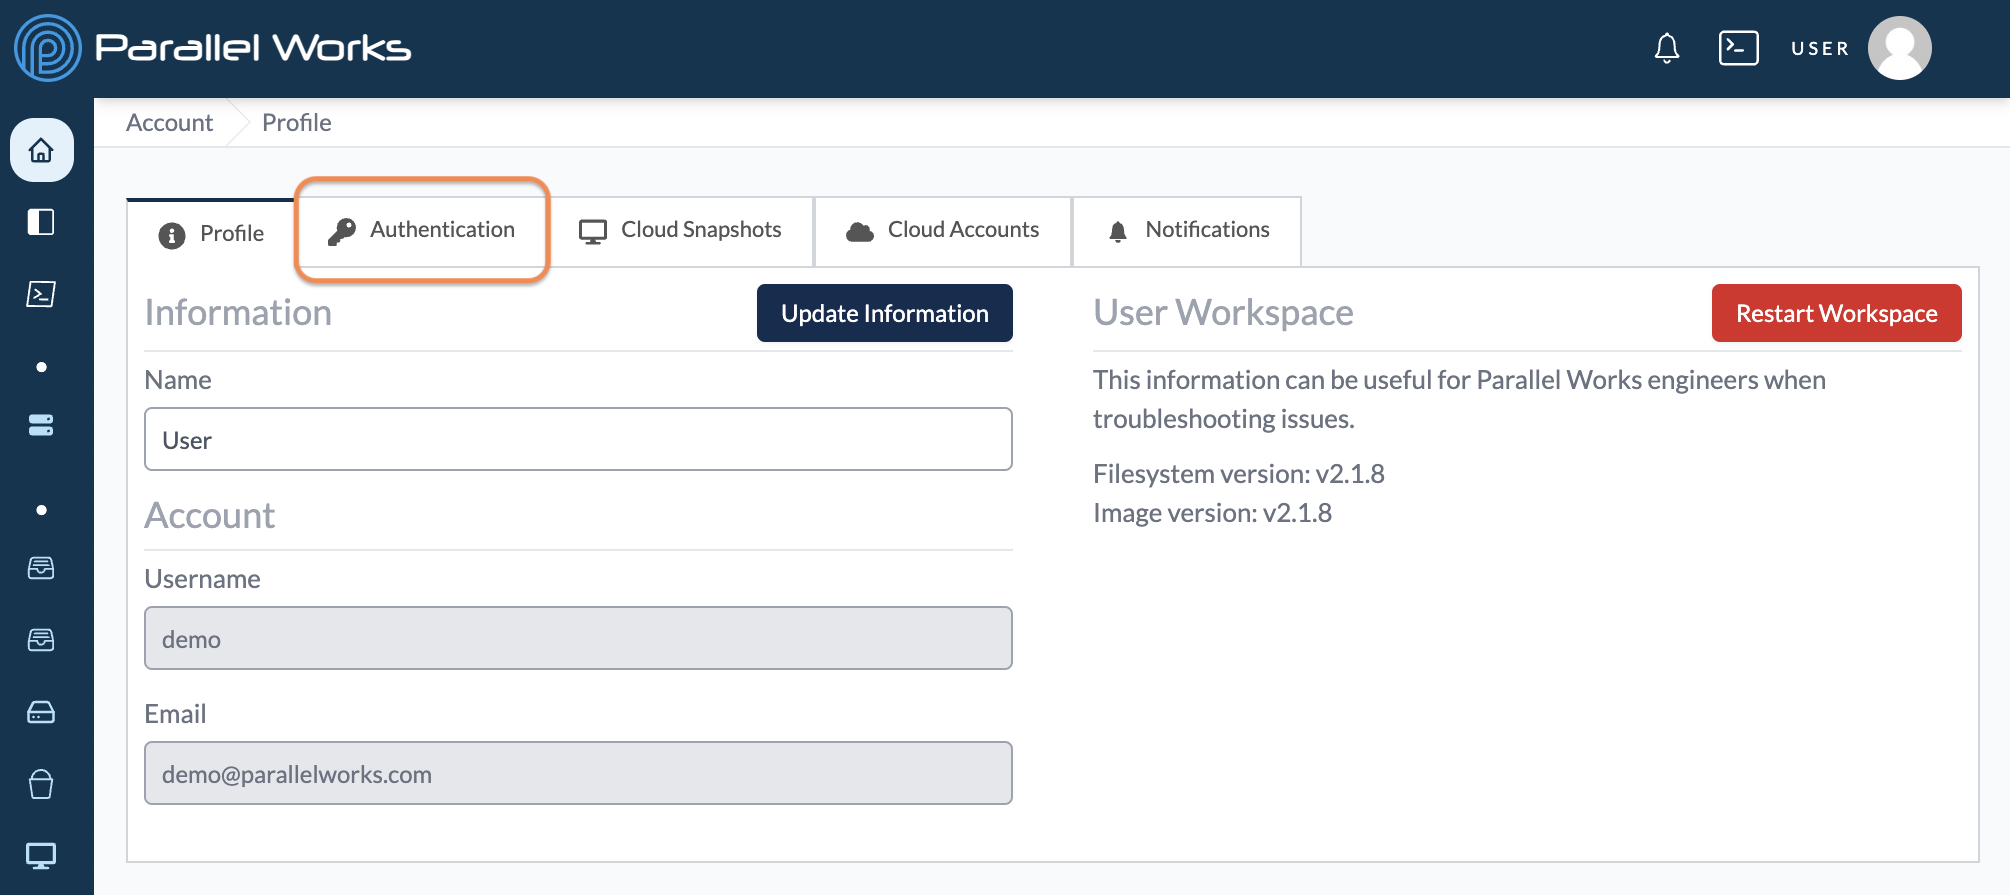
On the next page, click Authentication.
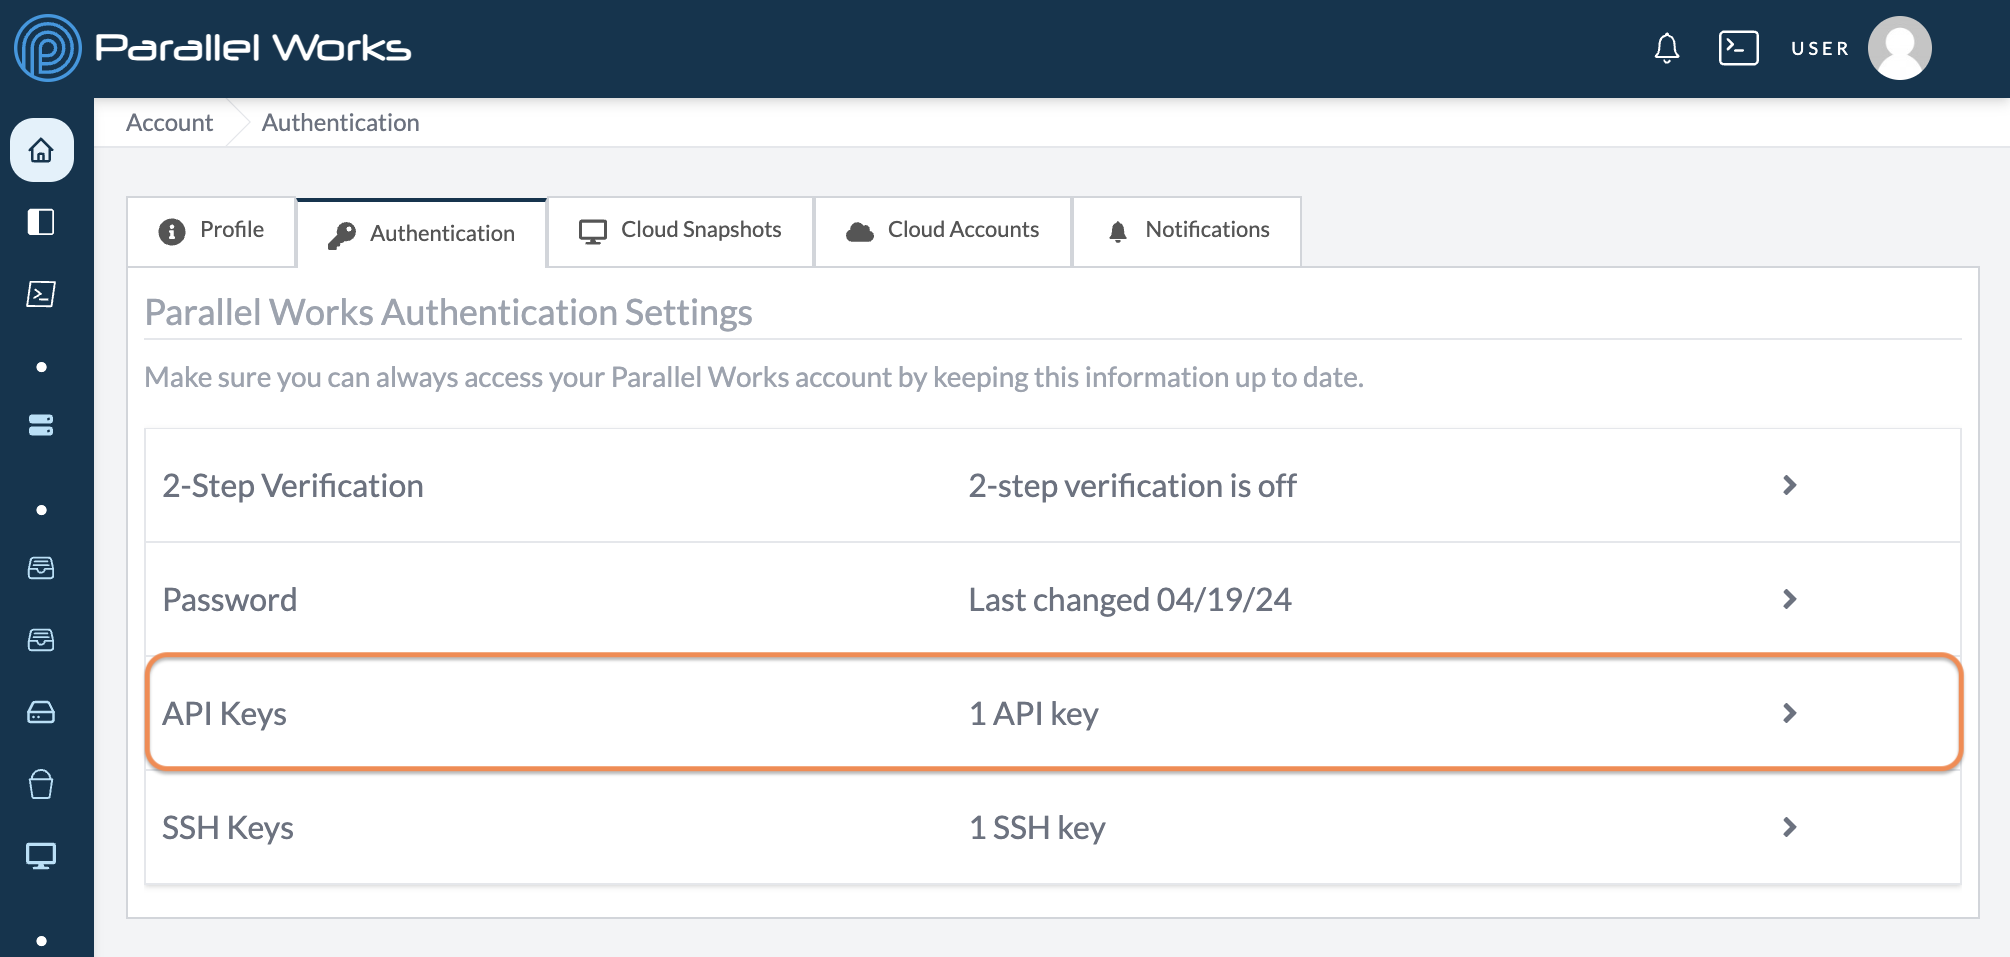
Click API Keys.
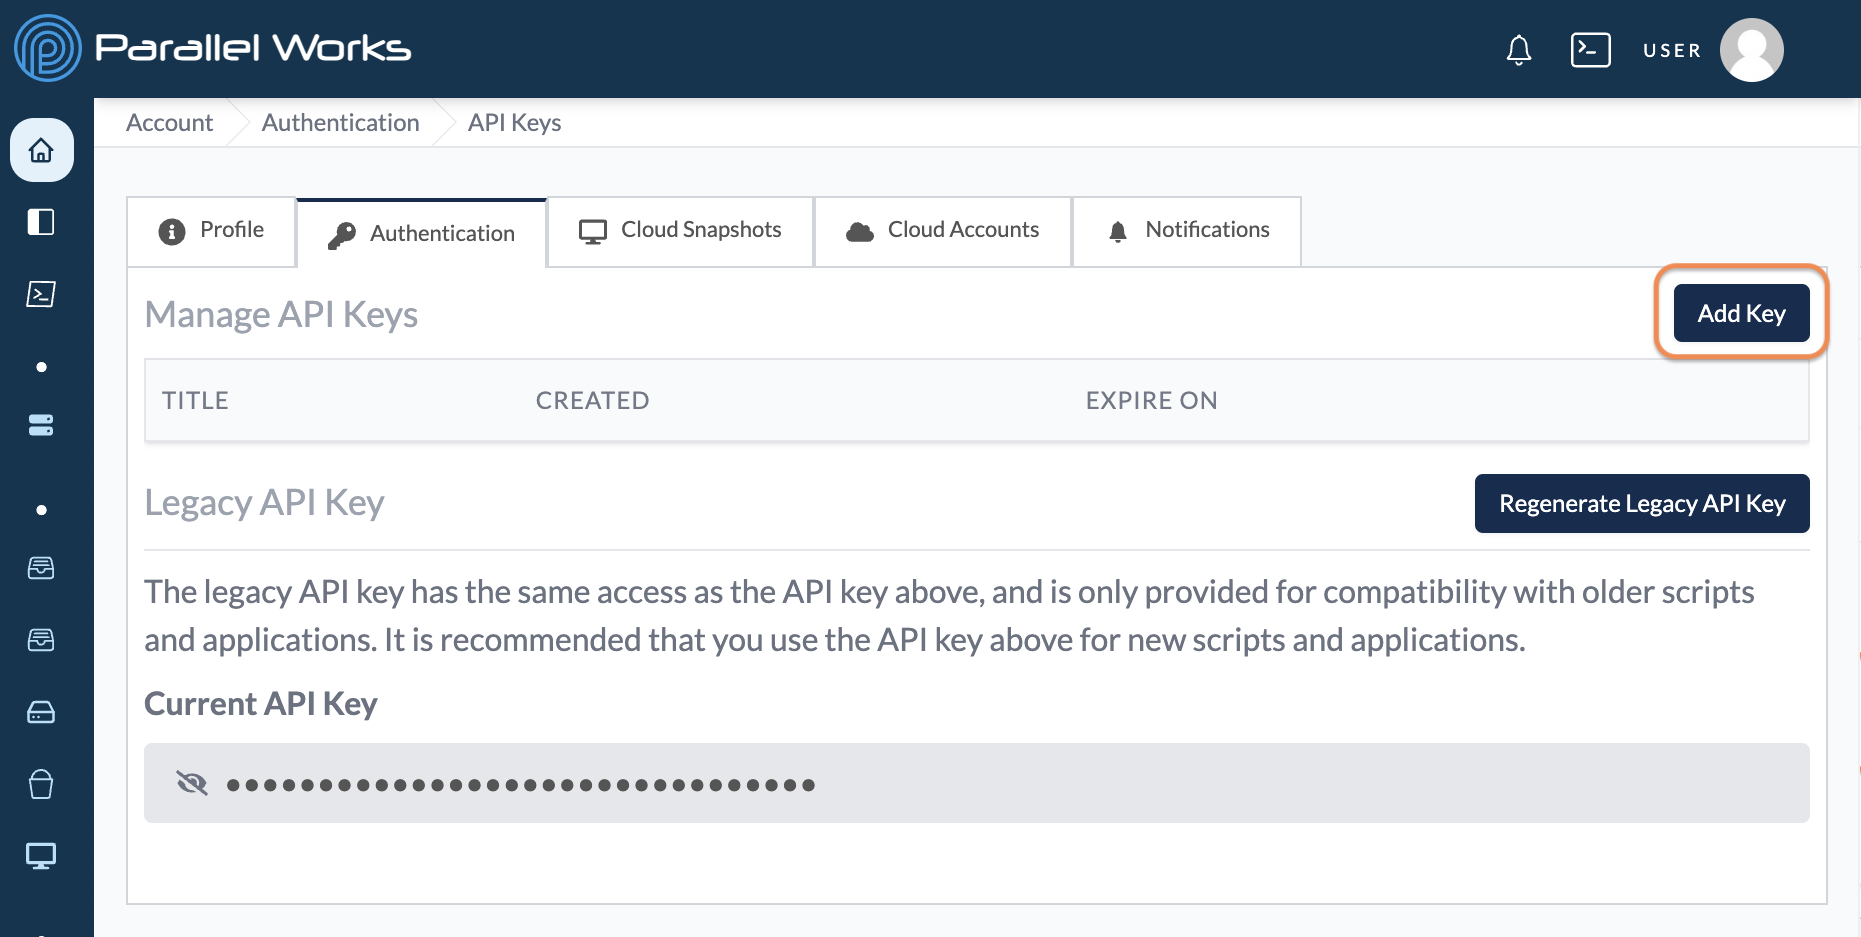
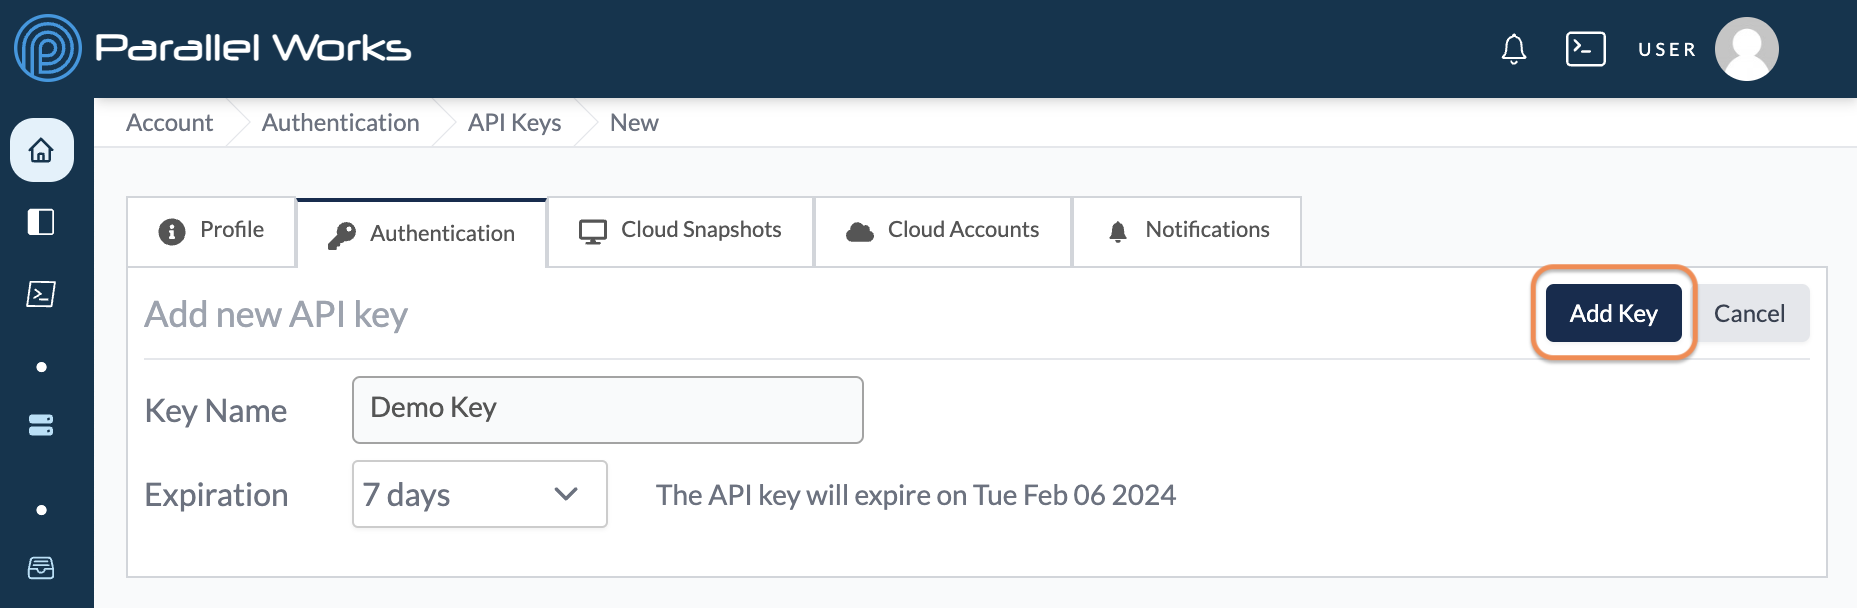
Click Add Key.
Enter a Key Name for the new API key.
If your organization permits users to select their own expiration date for API keys, use the Expiration dropdown menu to select when your key will expire. You can choose no expiration or a date in 7, 30, 60, or 90 days. Shorter expiration periods are more secure.
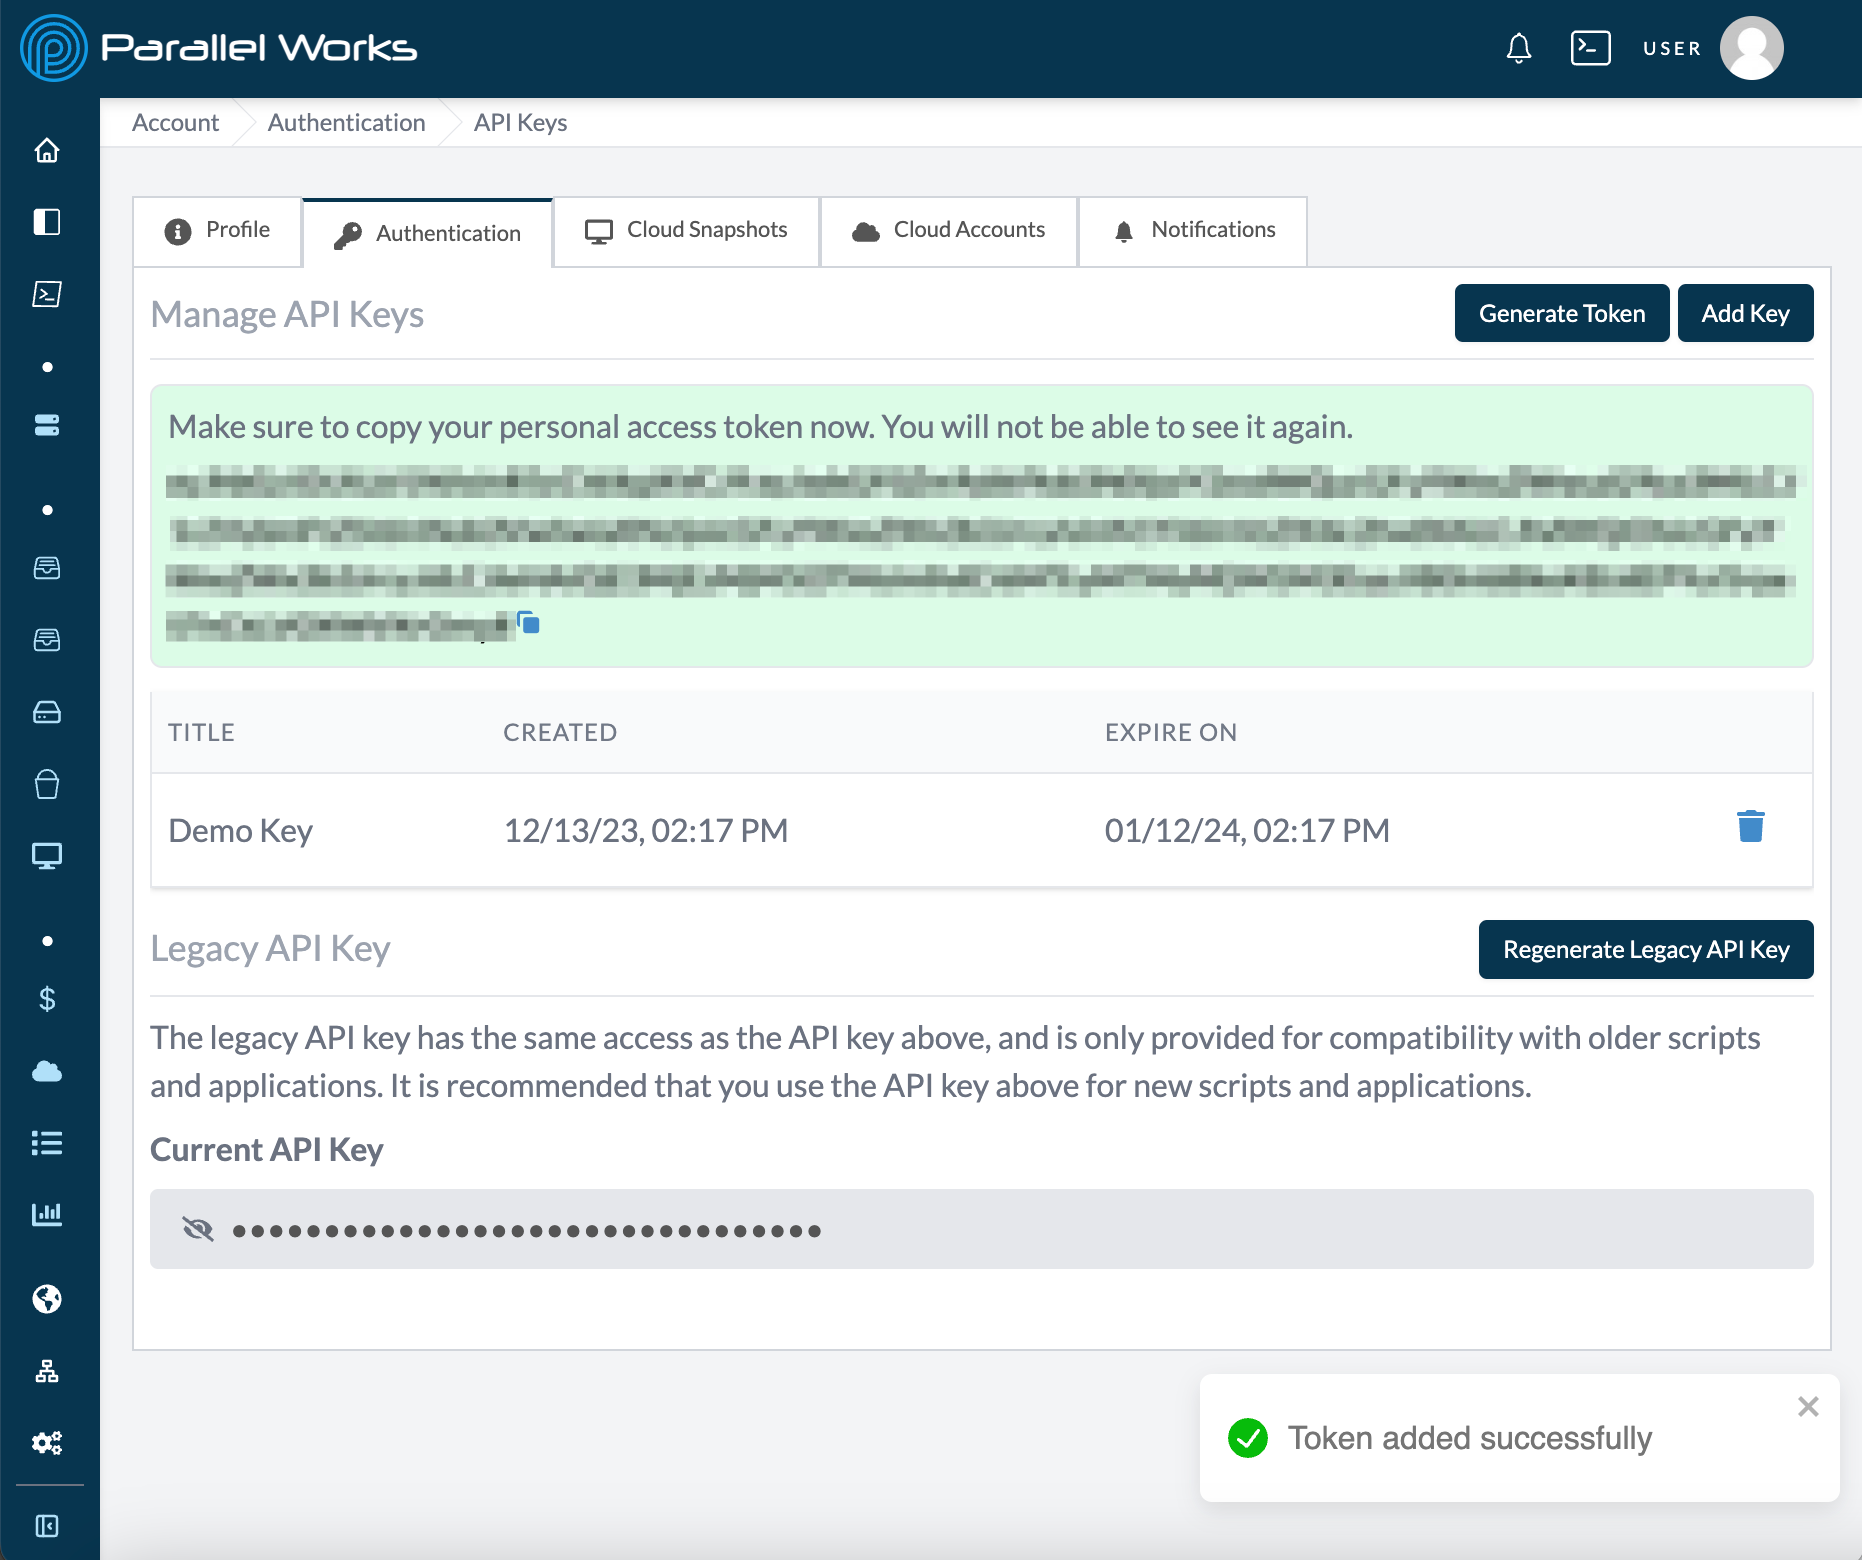
Click Add Key.
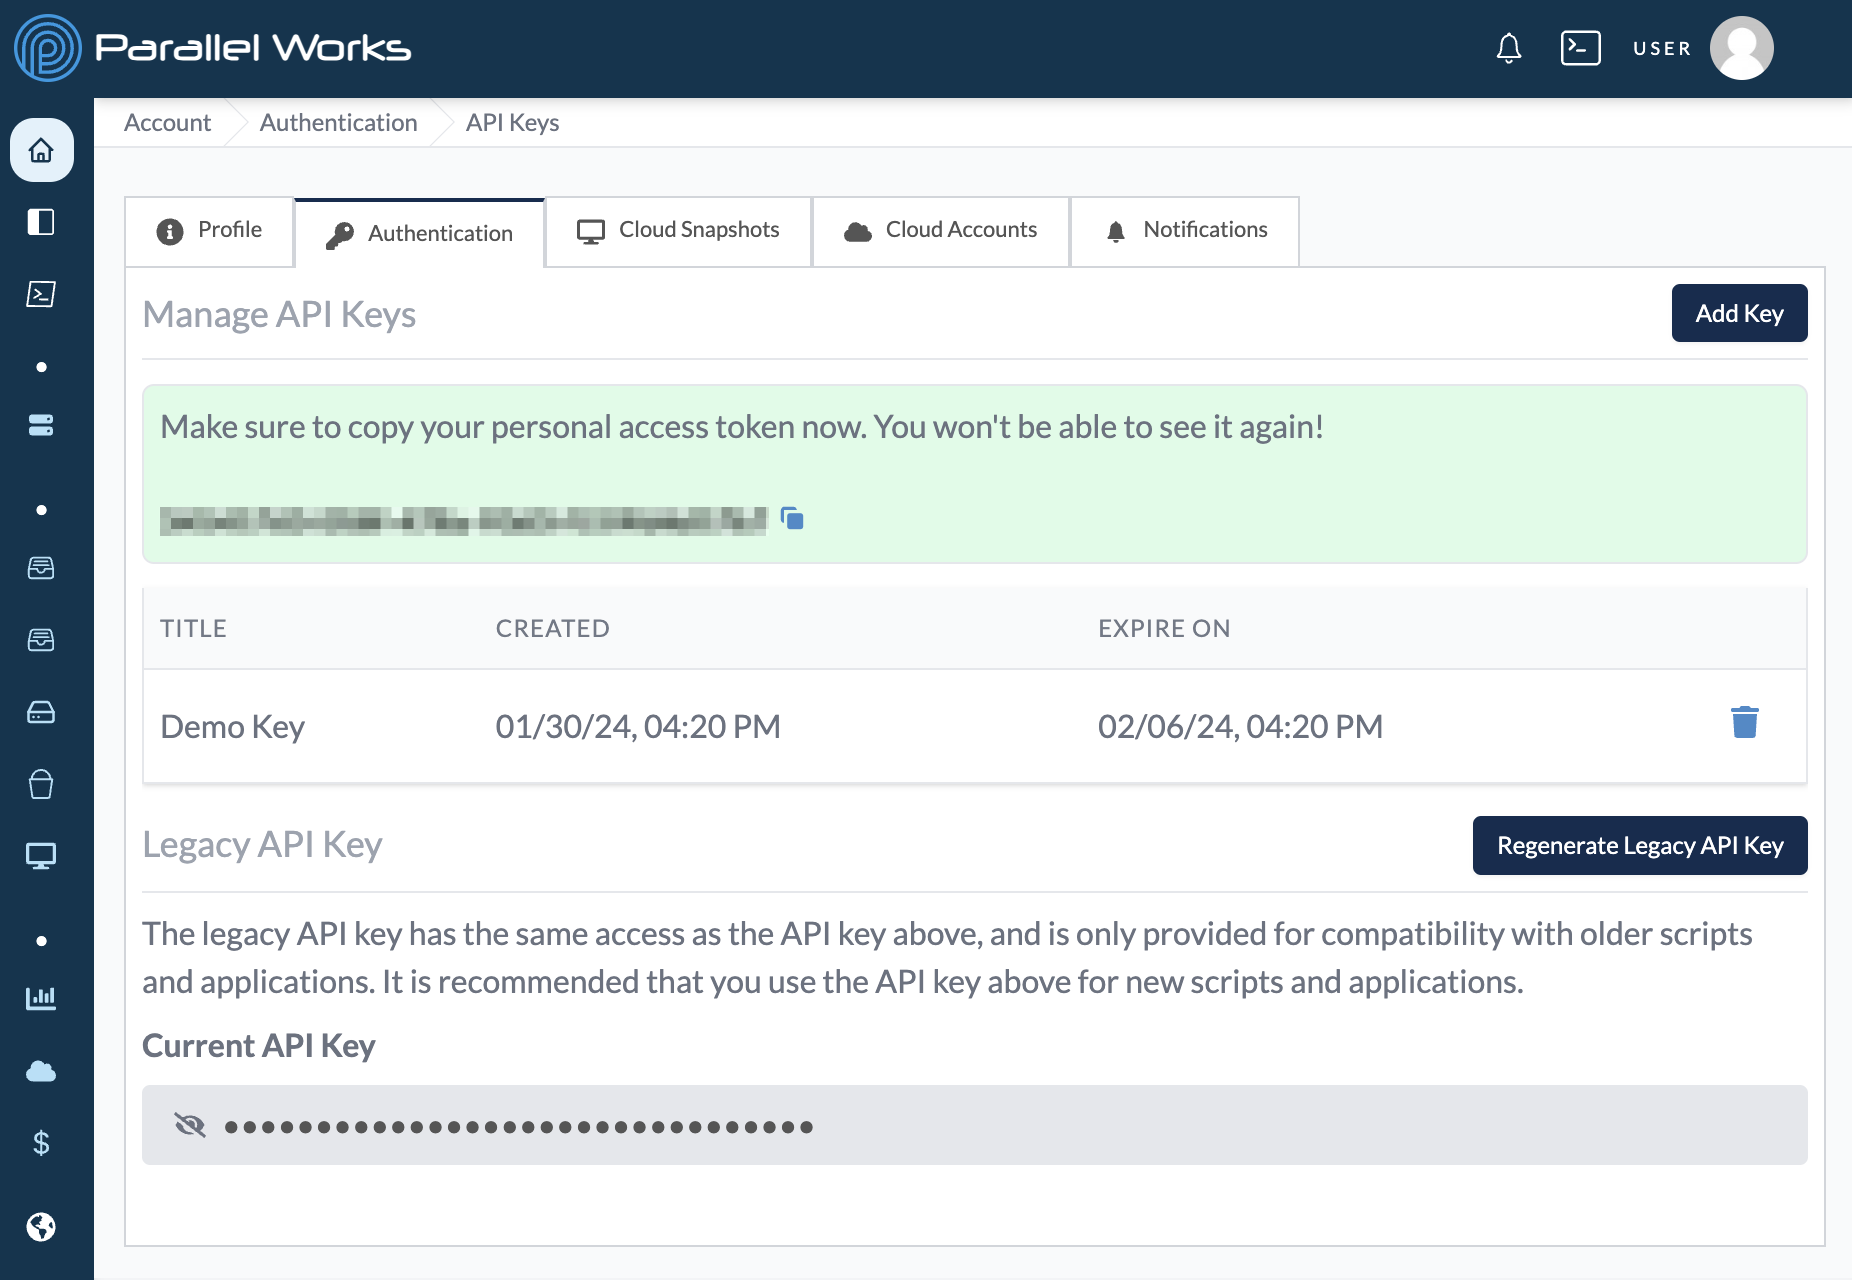
Your new API key will be displayed on the next page. You can use the copy button to copy and save the key in a secure place. Once you refresh or navigate away from this page, you won’t be able to see the key again.
Delete an API Key
Navigate to Account > Authentication > API Keys and click the delete icon to remove an API key from your ACTIVATE account.
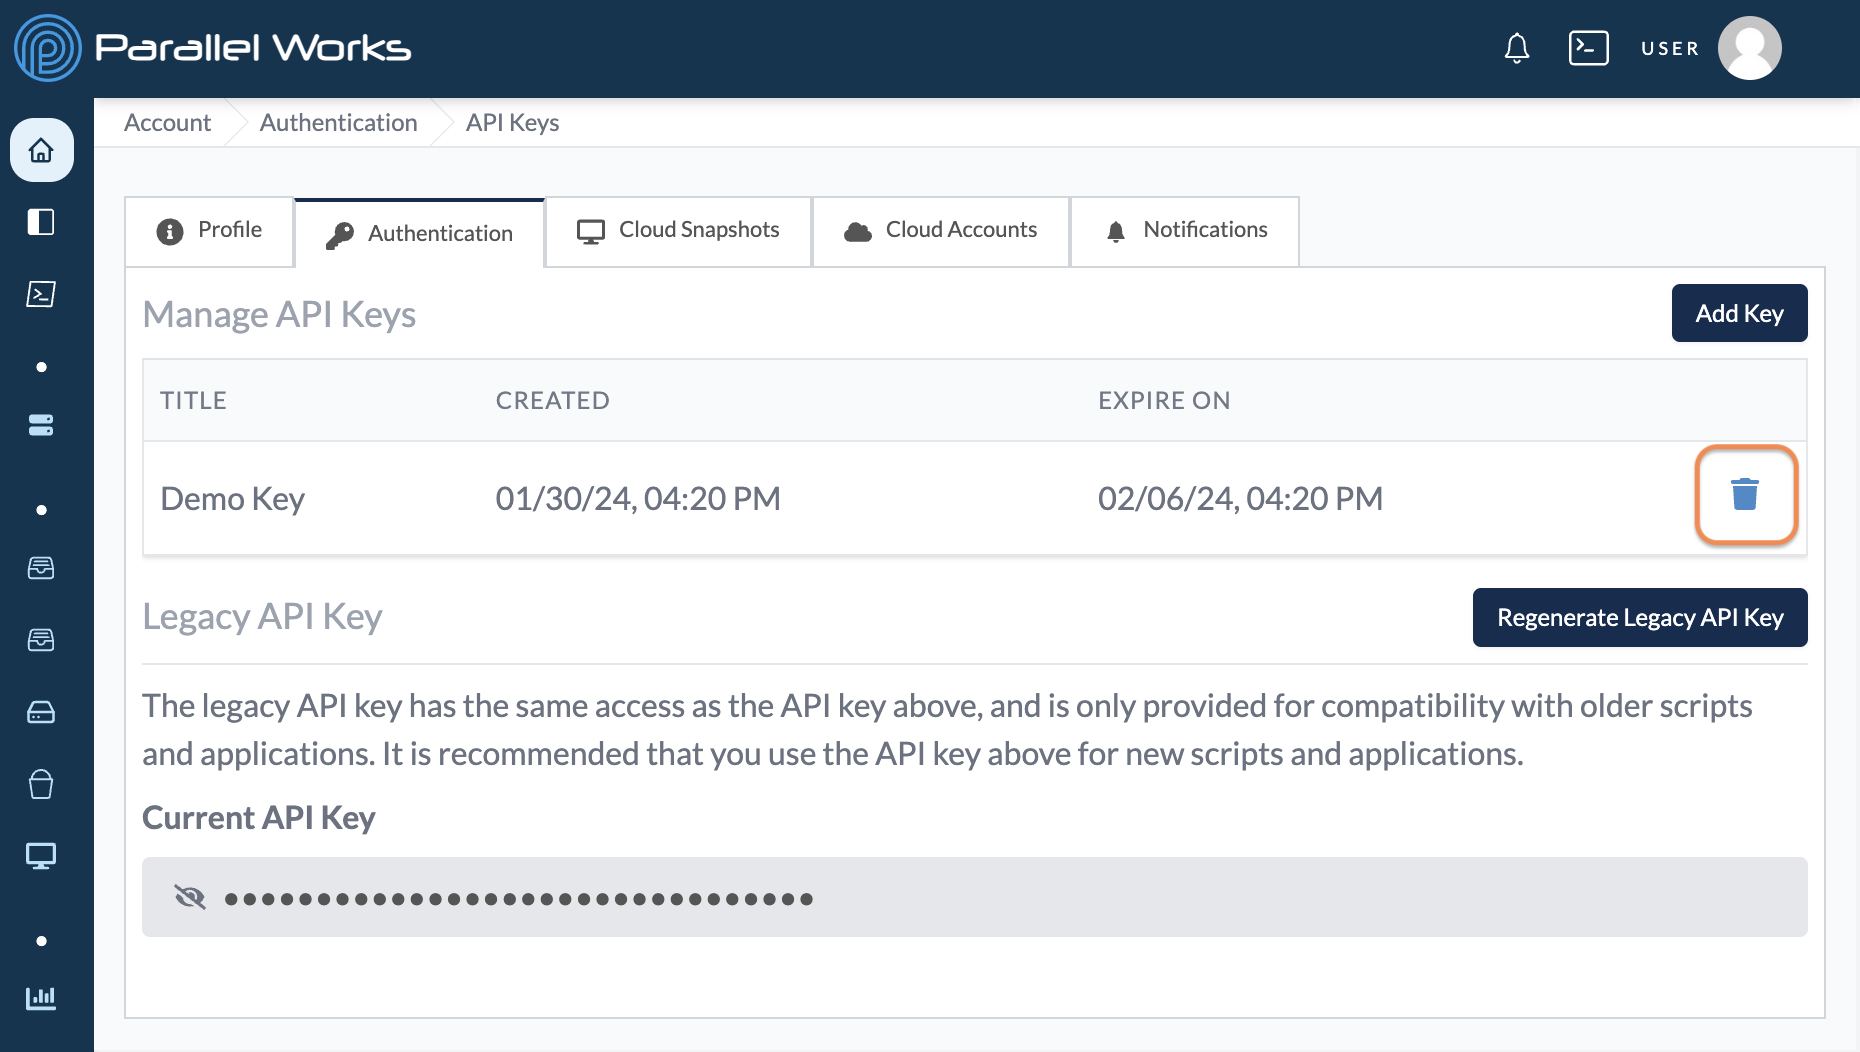
A dialog box will appear with more information about deleting your key. Click Delete API Key to confirm the deletion. The key will be removed from your account immediately.
Managing Tokens
You can create a short-term token and use it to authenticate our CLI after installing locally. These tokens last 24 hours, after which you will need to re-authenticate.
Create a Token
Navigate to your account settings (Username > Account).
On the next page, click Authentication.
Click API Keys.
Click Generate Token.
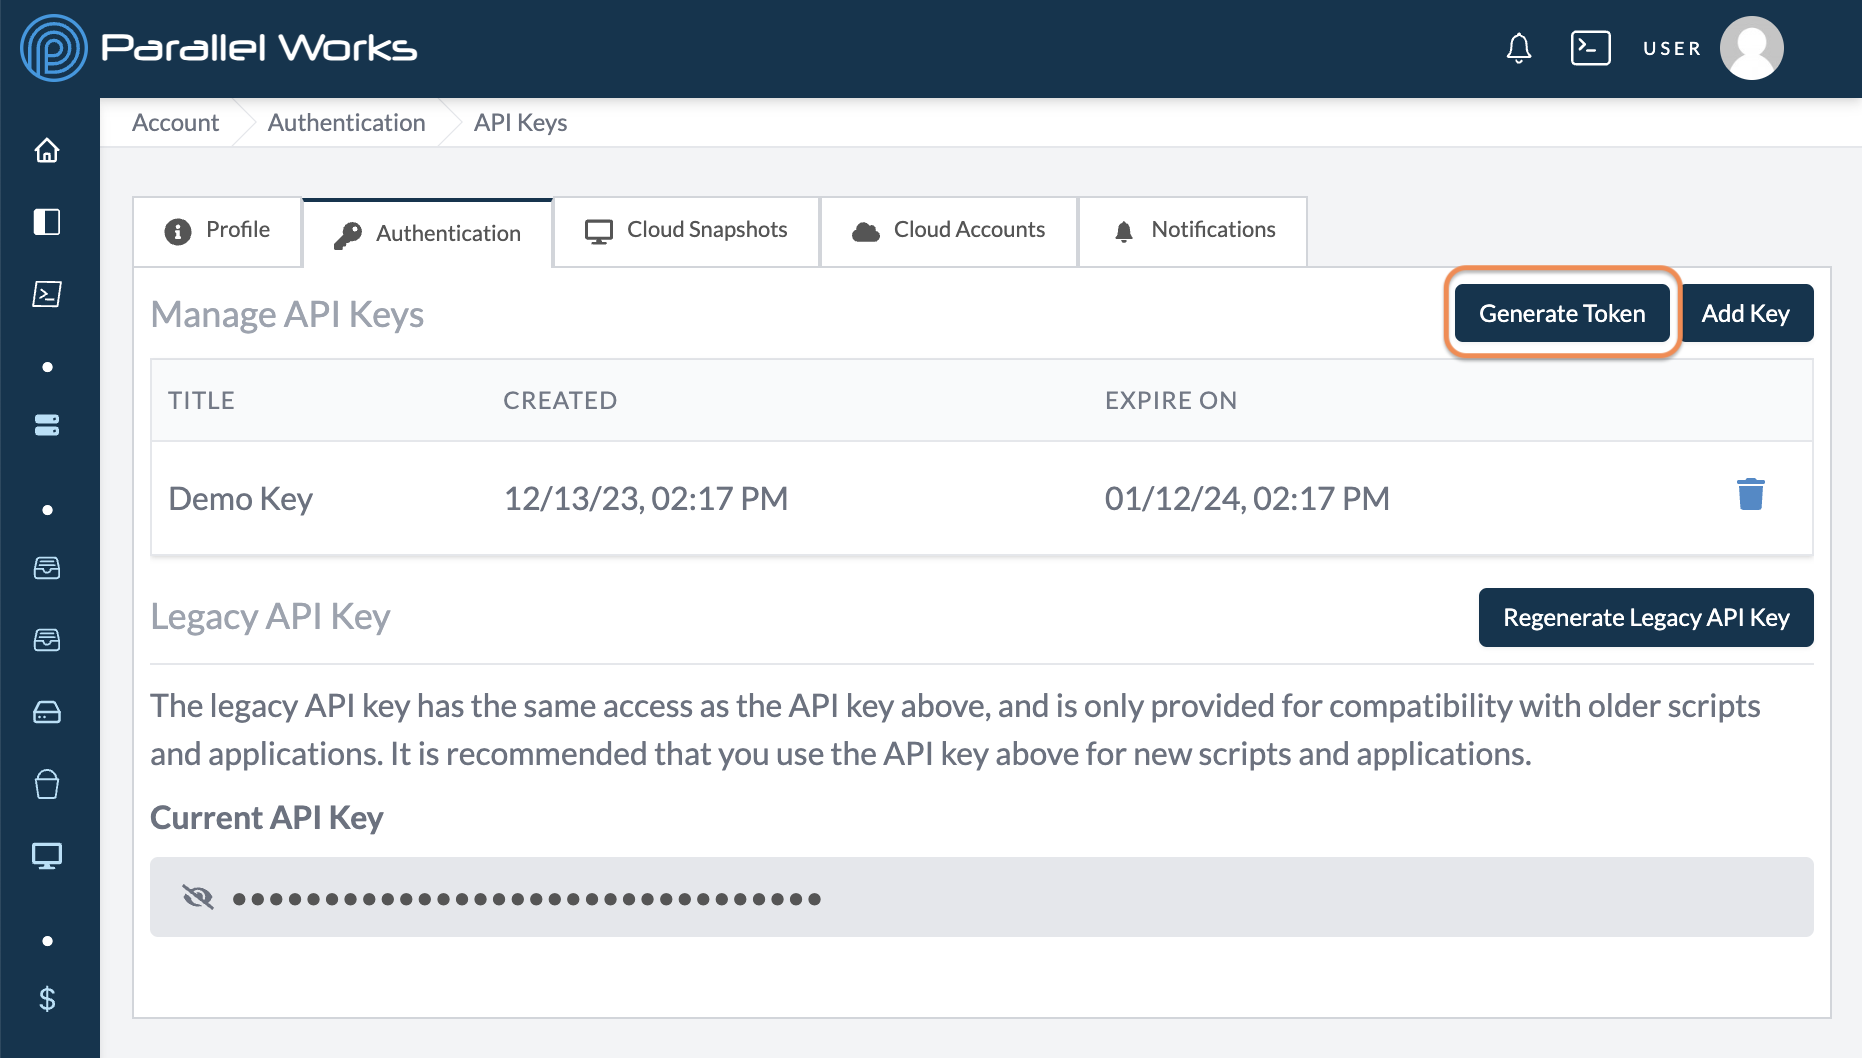
If your organization permits users to select their own expiration date for tokens, use the Expiration dropdown menu to select when your key will expire. You can choose from 1 hour up to 24 hours in 1-hour increments. Shorter expiration periods are more secure.
Click Add Token.

Your new token will be displayed on the next page. You can use the copy button to copy and save the key in a secure place. Once you refresh or navigate away from this page, you won’t be able to see the key again.
Managing SSH Keys
You can add an SSH key to your ACTIVATE account, which will allow you to log in to any active cluster from any device with that SSH key on it.
Create an SSH Key
Navigate to your account settings (Username > Account).
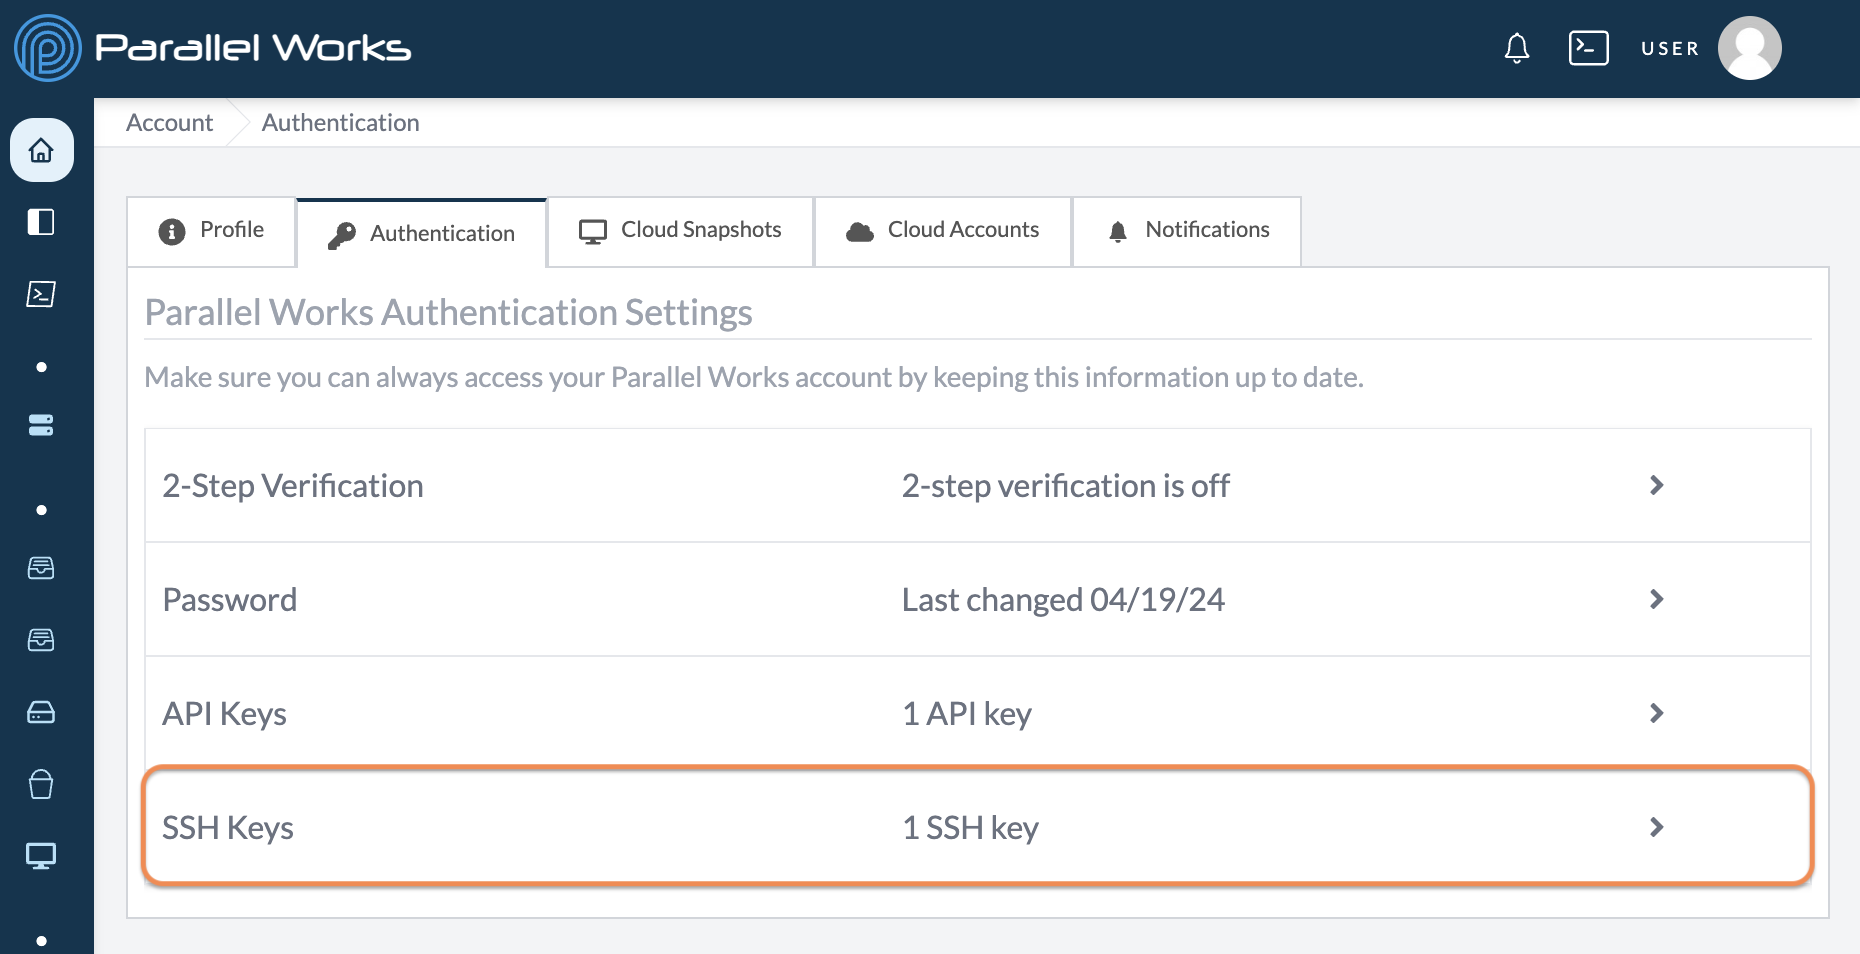
On the next page, click Authentication.
Click SSH Keys.
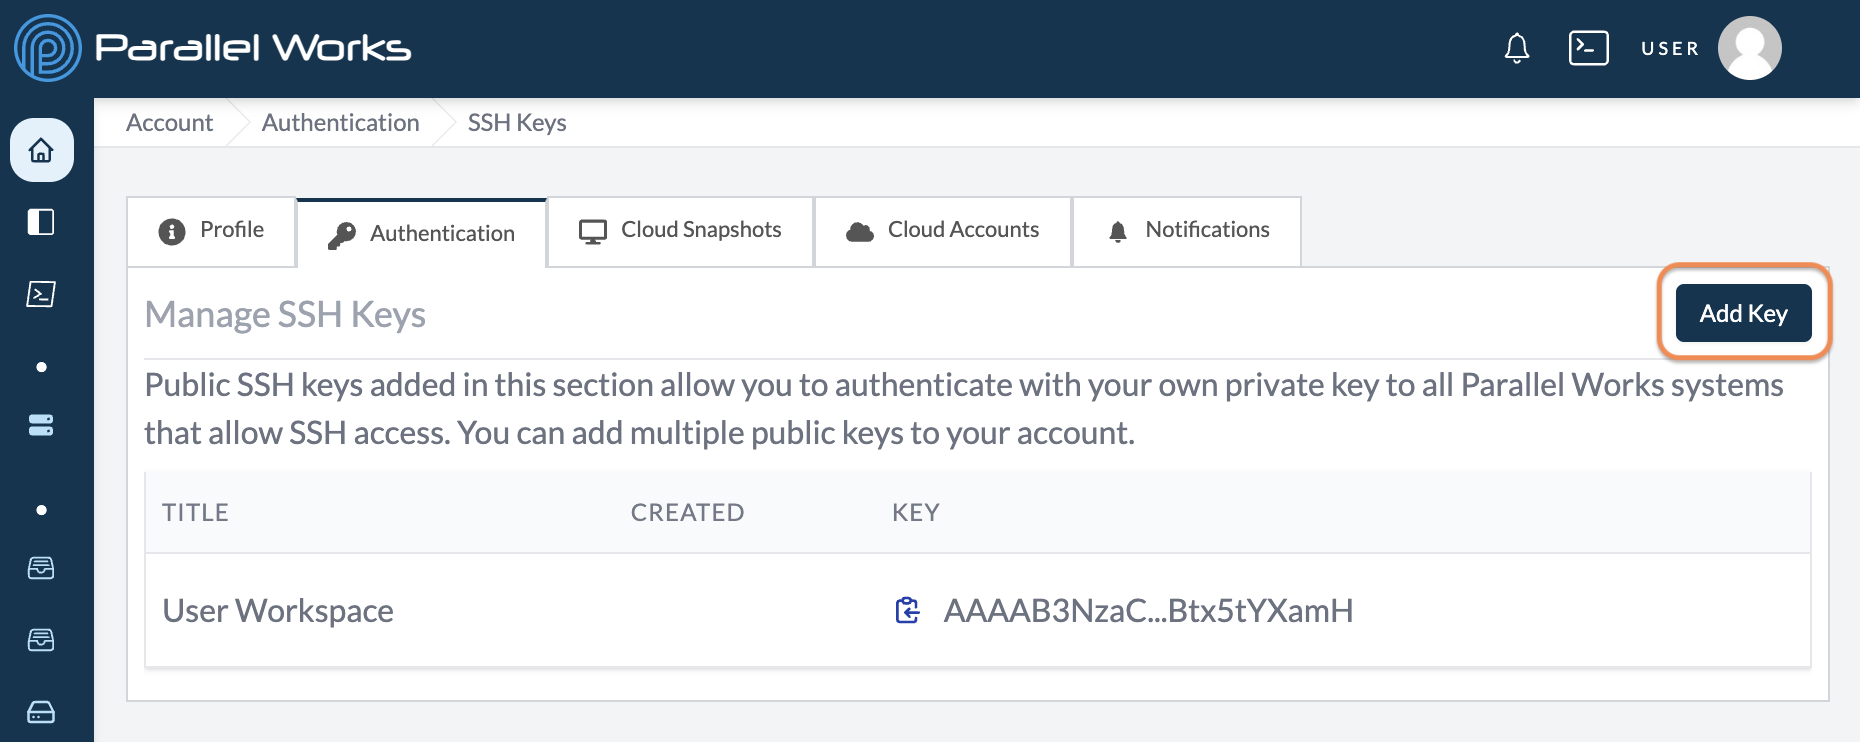
Click Add Key.
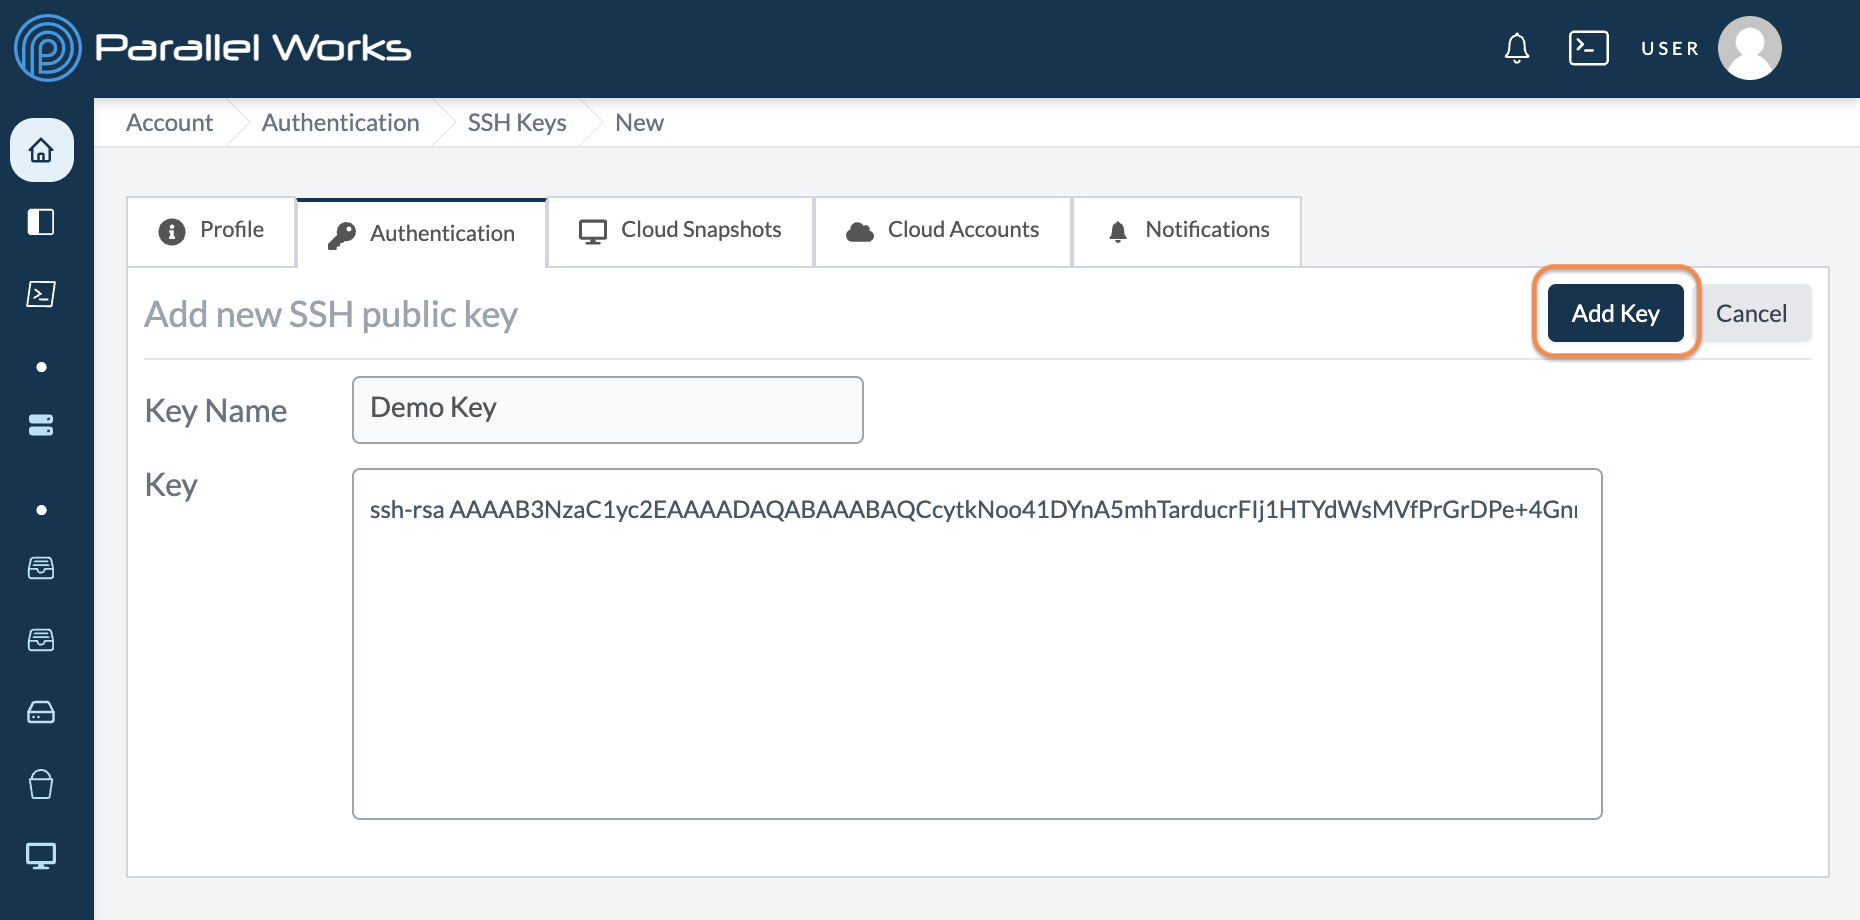
Use the Key Name field to give the key a unique name. Paste your public SSH key in the Key field.
Click Add Key.
You can now log in to any active cluster. Navigate to the terminal or command line on your device and enter ssh -i /path/to/ssh/private/key username@IPaddress:
parallelworks@Parallels-Macbook-Air sshtest % ssh -i ./id_rsa demo@34.135.24.147
Last failed login: Thu Mar  2 09:48:20 UTC 2023 from 60.94.197.104.bc.googleusercontent.com on ssh:notty
[demo@democluster-70 ~]$
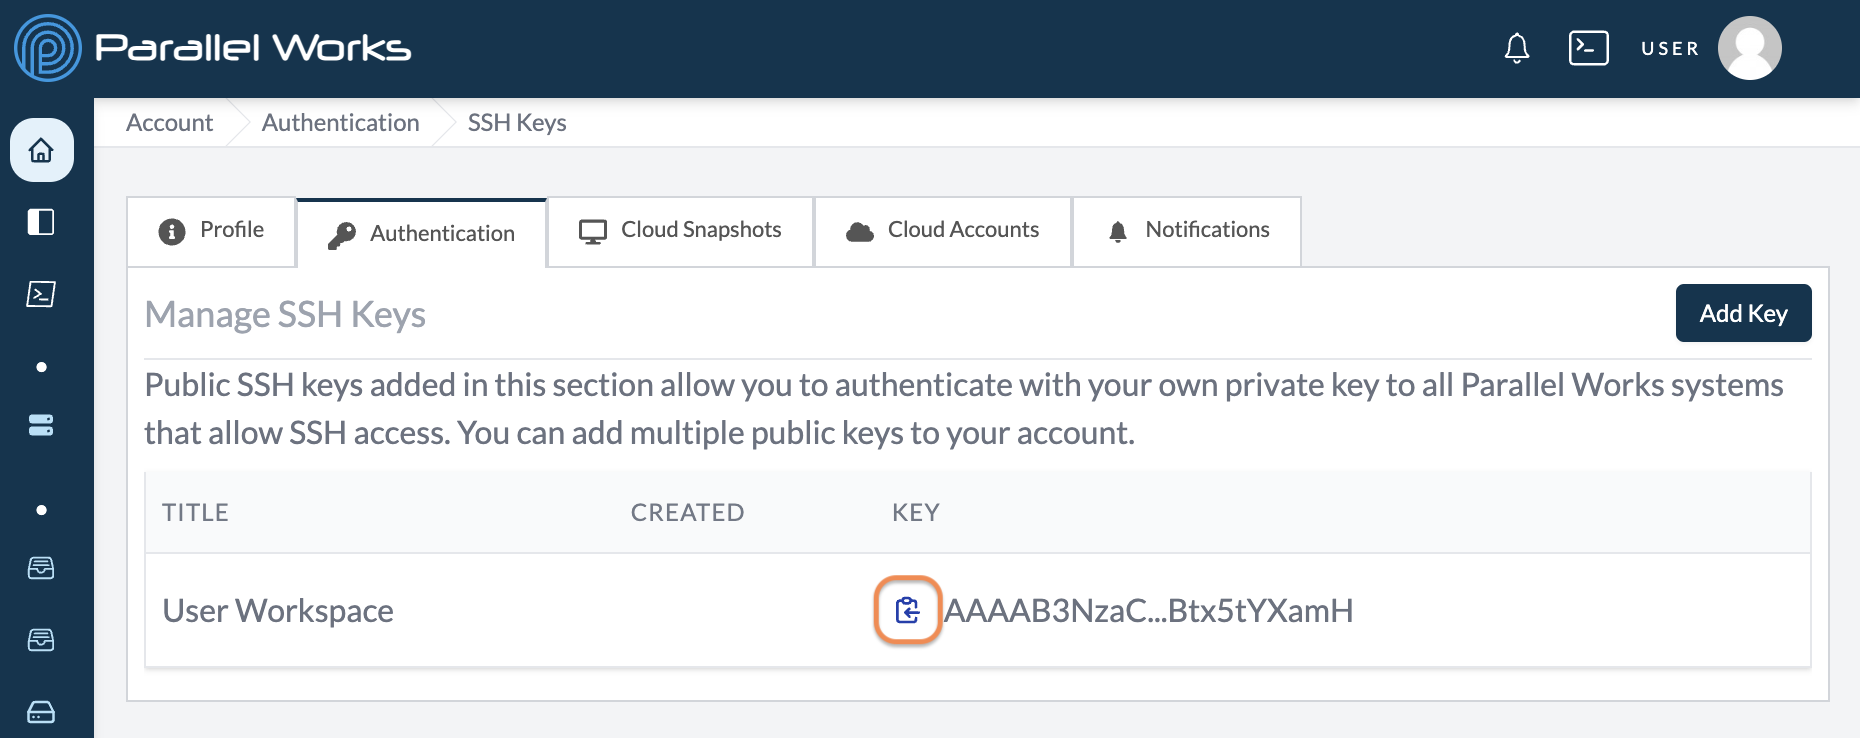
Copy an SSH Key
In Account > Authentication > SSH Keys, click the clipboard icon to copy your SSH key to your computer's clipboard.
Managing SSH Private Keys
You can store private SSH keys on your ACTIVATE account, which the platform uses on your behalf to connect to remote resources — for example, existing clusters that require an SSH credential you already hold.
Unlike the public SSH keys described above (which let you log in to your clusters), private keys let ACTIVATE log in from the platform to a remote resource.
Create an SSH Private Key
Navigate to your account settings (Username > Account). On the next page, click SSH Private Keys.
Click New SSH Private Key.
Use the Name field to give the key a unique name, and optionally add a Description. Paste your private key in the Remote Resource SSH Private Key field.
Click Create SSH Private Key. A dialog box with the message SSH Private Key created successfully will appear, and the key will be listed with its account name, description, and creation date.
Delete an SSH Private Key
In Account > SSH Private Keys, click the delete icon in the key's row. A dialog box will appear; click Delete credentials to confirm.
Managing Multi-Factor Authentication
You can add a second verification step to your account. With 2-Step Verification turned on, signing in requires a code from an authenticator app in addition to your password.
Turn On 2-Step Verification
Navigate to your account settings (Username > Account). On the next page, click Authentication.
Click the 2-Step Verification row, which shows whether 2-Step Verification is currently on or off.
On the Manage MFA Settings page, find the Authenticator app card and click Use Authenticator.
On the Setup Authenticator App page, use a phone app like 1Password, Authy, Google Authenticator, or Microsoft Authenticator to scan the QR code. If you can't scan the QR code, click Can't scan the QR code? to reveal a secret key you can enter in your app manually.
Enter the 6-digit code from your app in the Verification code field and click Enable 2FA. A dialog box with the message MFA setup successful will appear.
The next time you sign in, you'll be asked for a code from your authenticator app after entering your password.
Feature Preview
Security keys (WebAuthn) are also available as an MFA method through a Feature Preview. Organizations can require them with the Enforce Security Key MFA policy.
Turn Off 2-Step Verification
Navigate to Account > Authentication > 2-Step Verification.
To remove your authenticator app, click the delete icon on its card. A dialog box will appear; click Remove Authenticator app to confirm. Your authenticator will be removed immediately.
To turn off 2-Step Verification entirely, click Turn Off. A dialog box will appear; click Turn off 2-Step Verification to confirm.