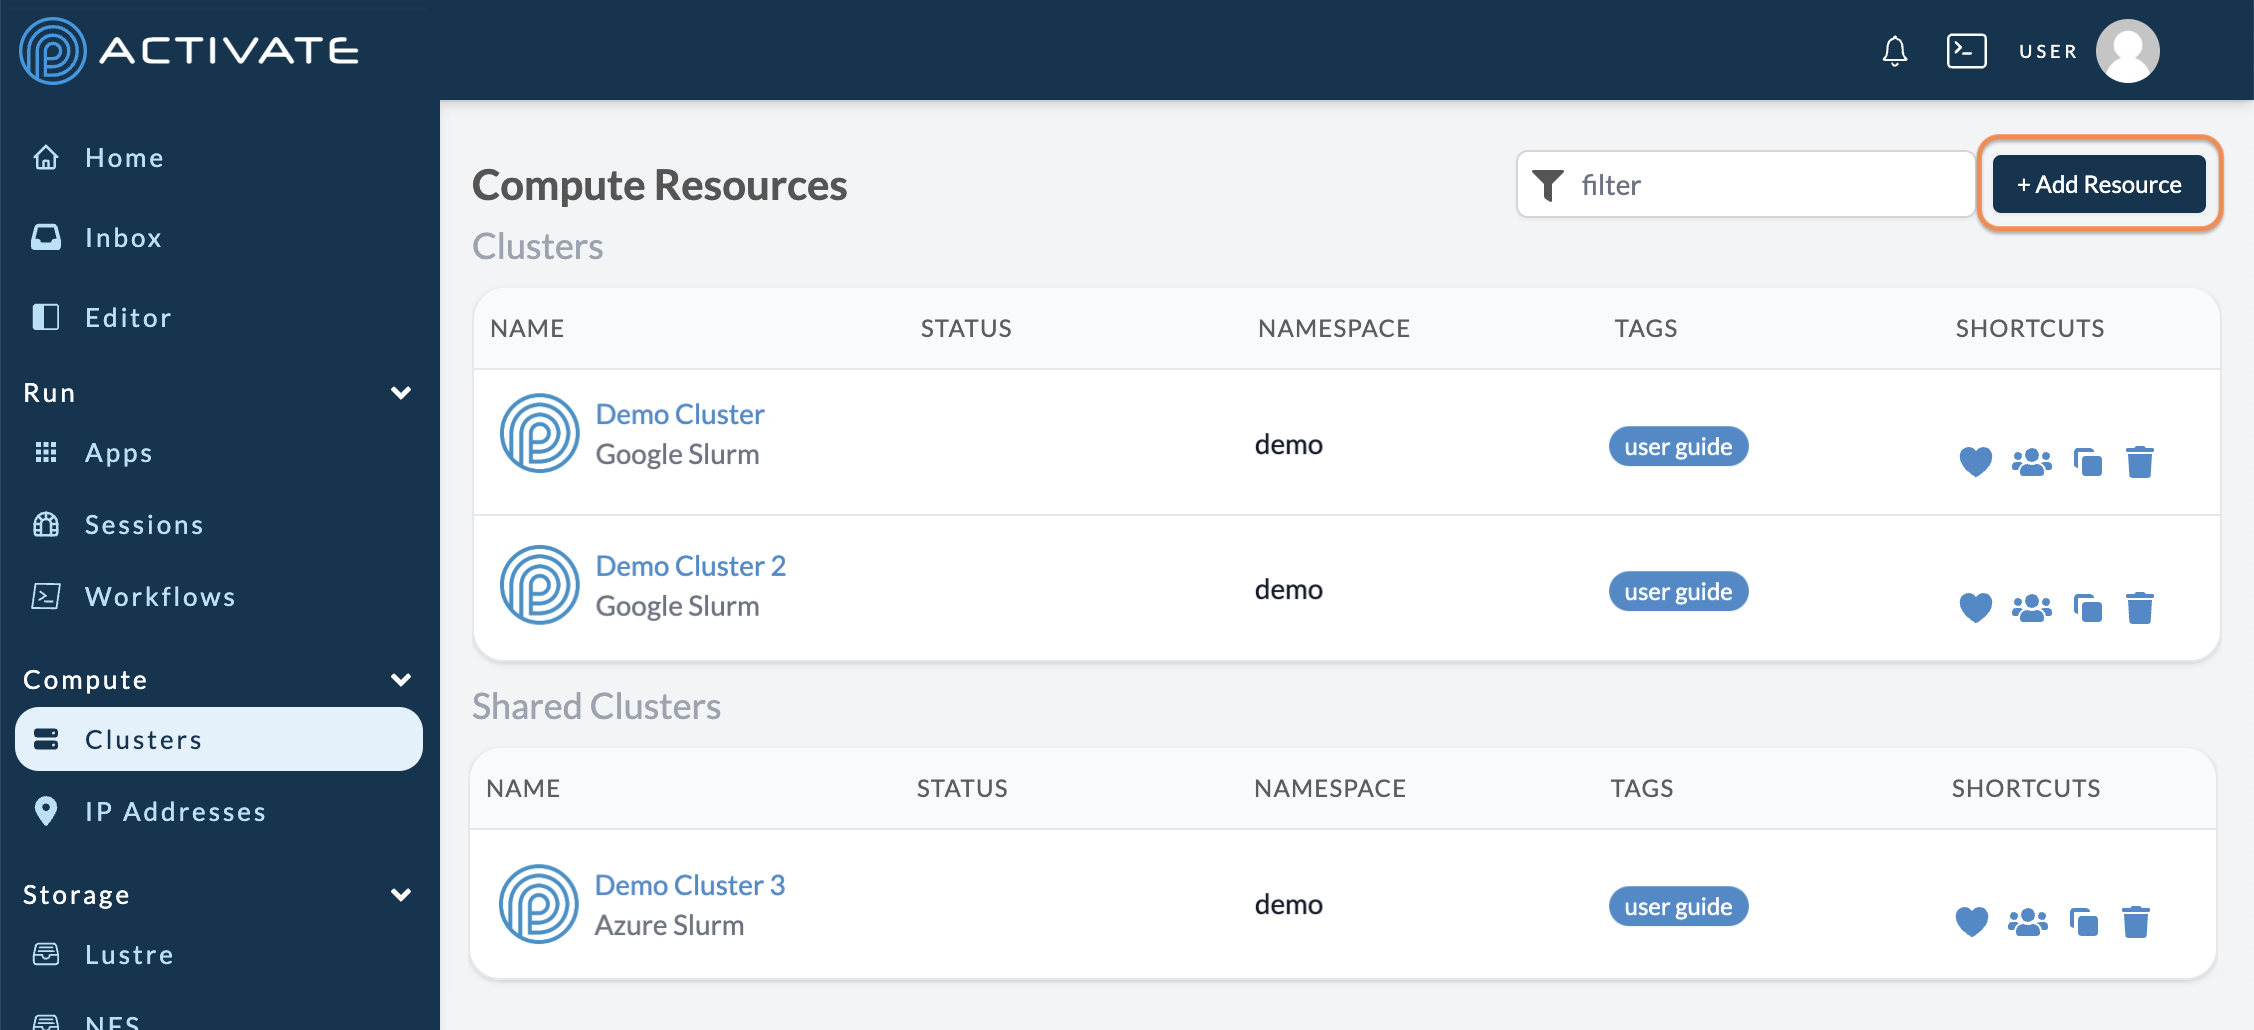
Creating Clusters
Any work you do on ACTIVATE will need to be completed on a compute resource. If you don’t have any pre-configured resources that fit your needs for the project at hand, you can create a new one.
Navigate to the Clusters page and select + Add Resource.
Now you can select the type of resource you need from the available elastic clusters. Once you choose your type of resource, you can create a cluster on a specific cloud service provider (CSP). For example, if you want to create an elastic cluster, you can do so with resources from AWS, Azure, or Google.
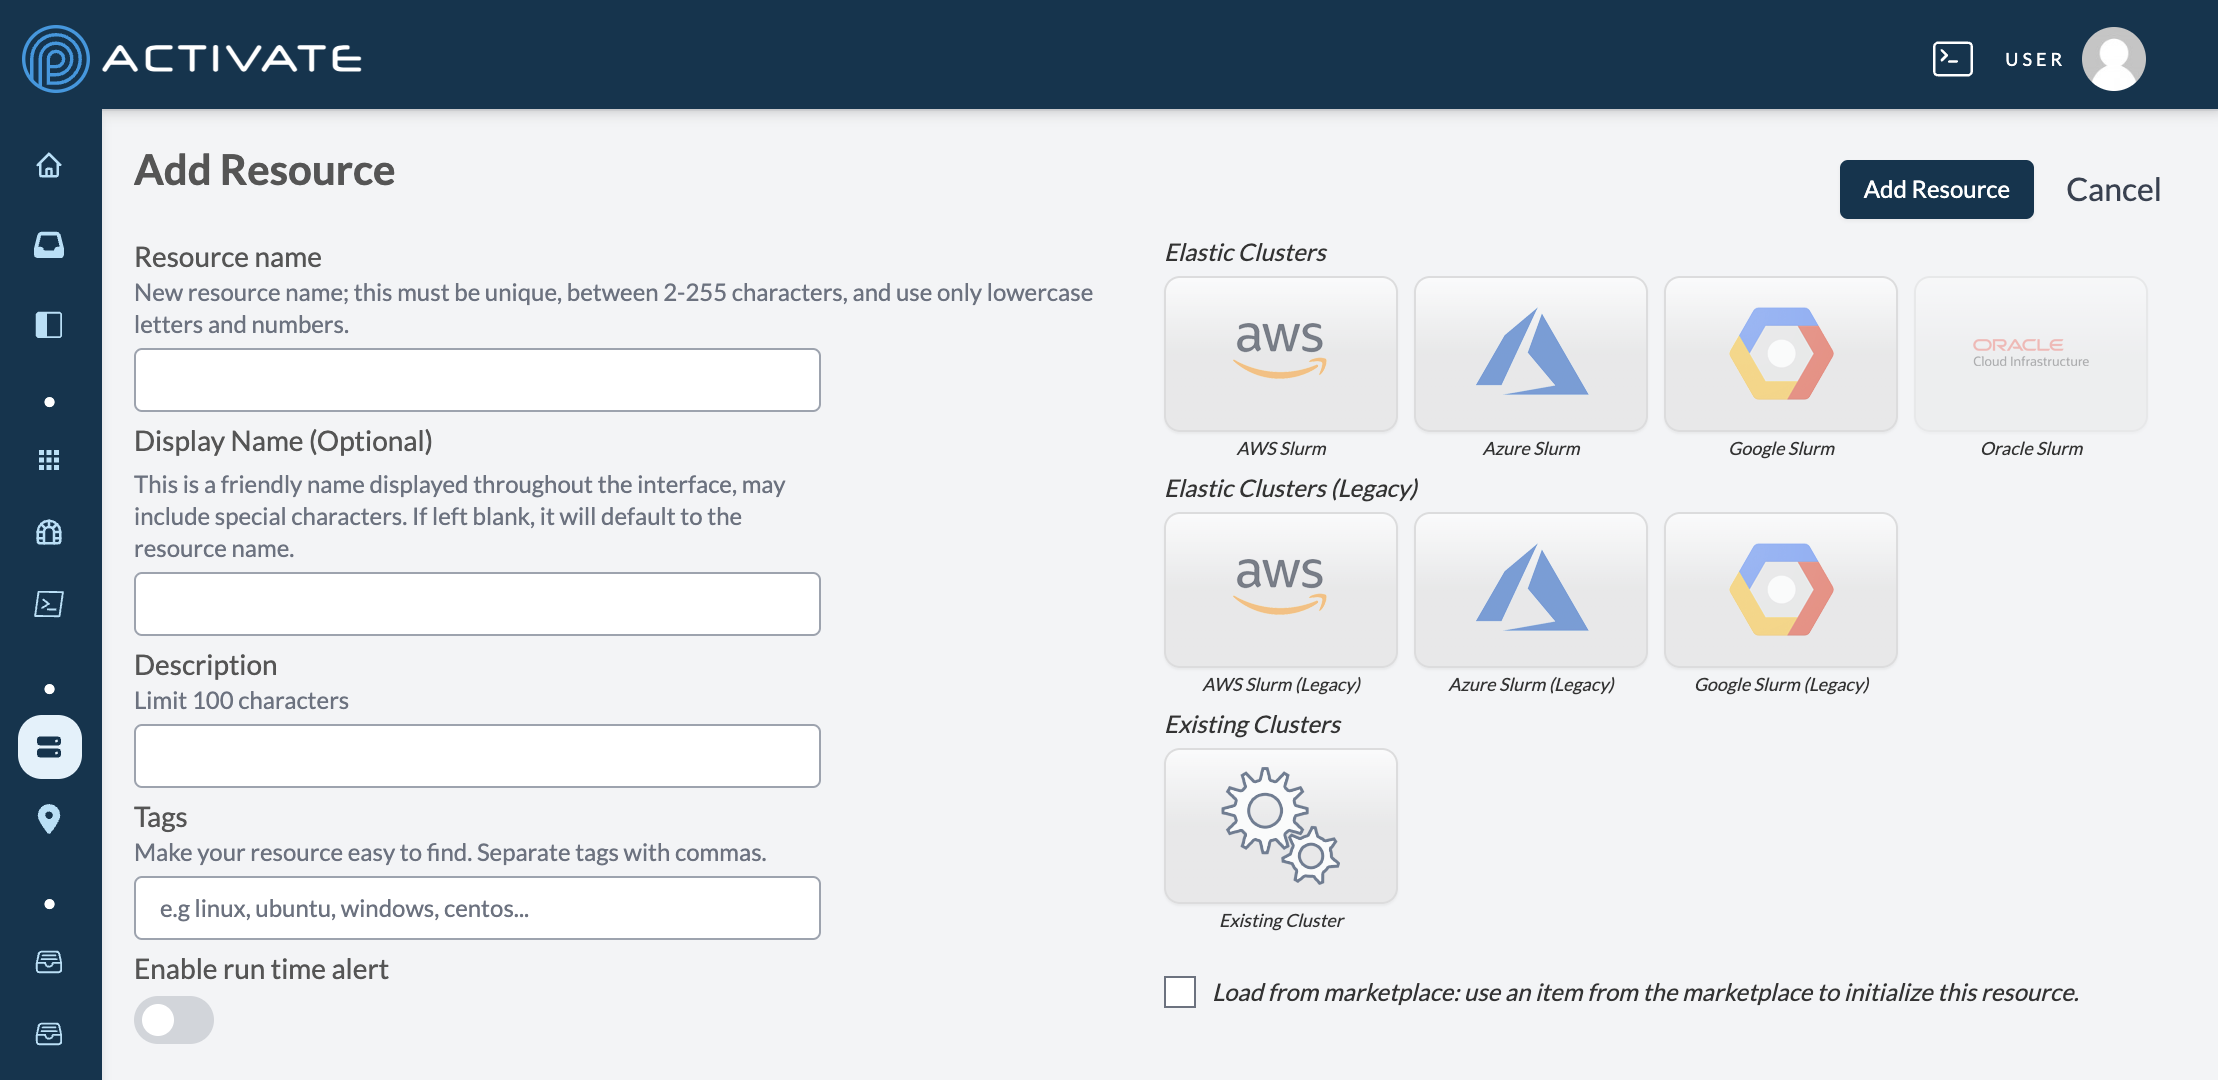
You must enter a Cluster Name. The Display Name, Description, and Tags are optional. If you leave Display Name blank, the cluster will default to the Cluster Name text.
Optionally, you can use the toggle button for Enable run time alert. When enabled, you'll receive an automated email from noreply@parallelworks.com at a set hourly interval, reminding you that your cluster is still running:
Dear {username},

This is an automated message to inform you that your cluster {cluster_name} has been running for {time} hours. Please take note of the following details:

Cluster name: {cluster_name}
Cluster start time: {start_date}
Total run time: {total_time}
Next alert time: {next_alert}

This alert can be turned off in the resource's properties page.

Sincerely,

Parallel Works
When you click the toggle button, the field for Alert Interval (Hours) will appear. The value you enter here determines how often you'll receive run time alerts.
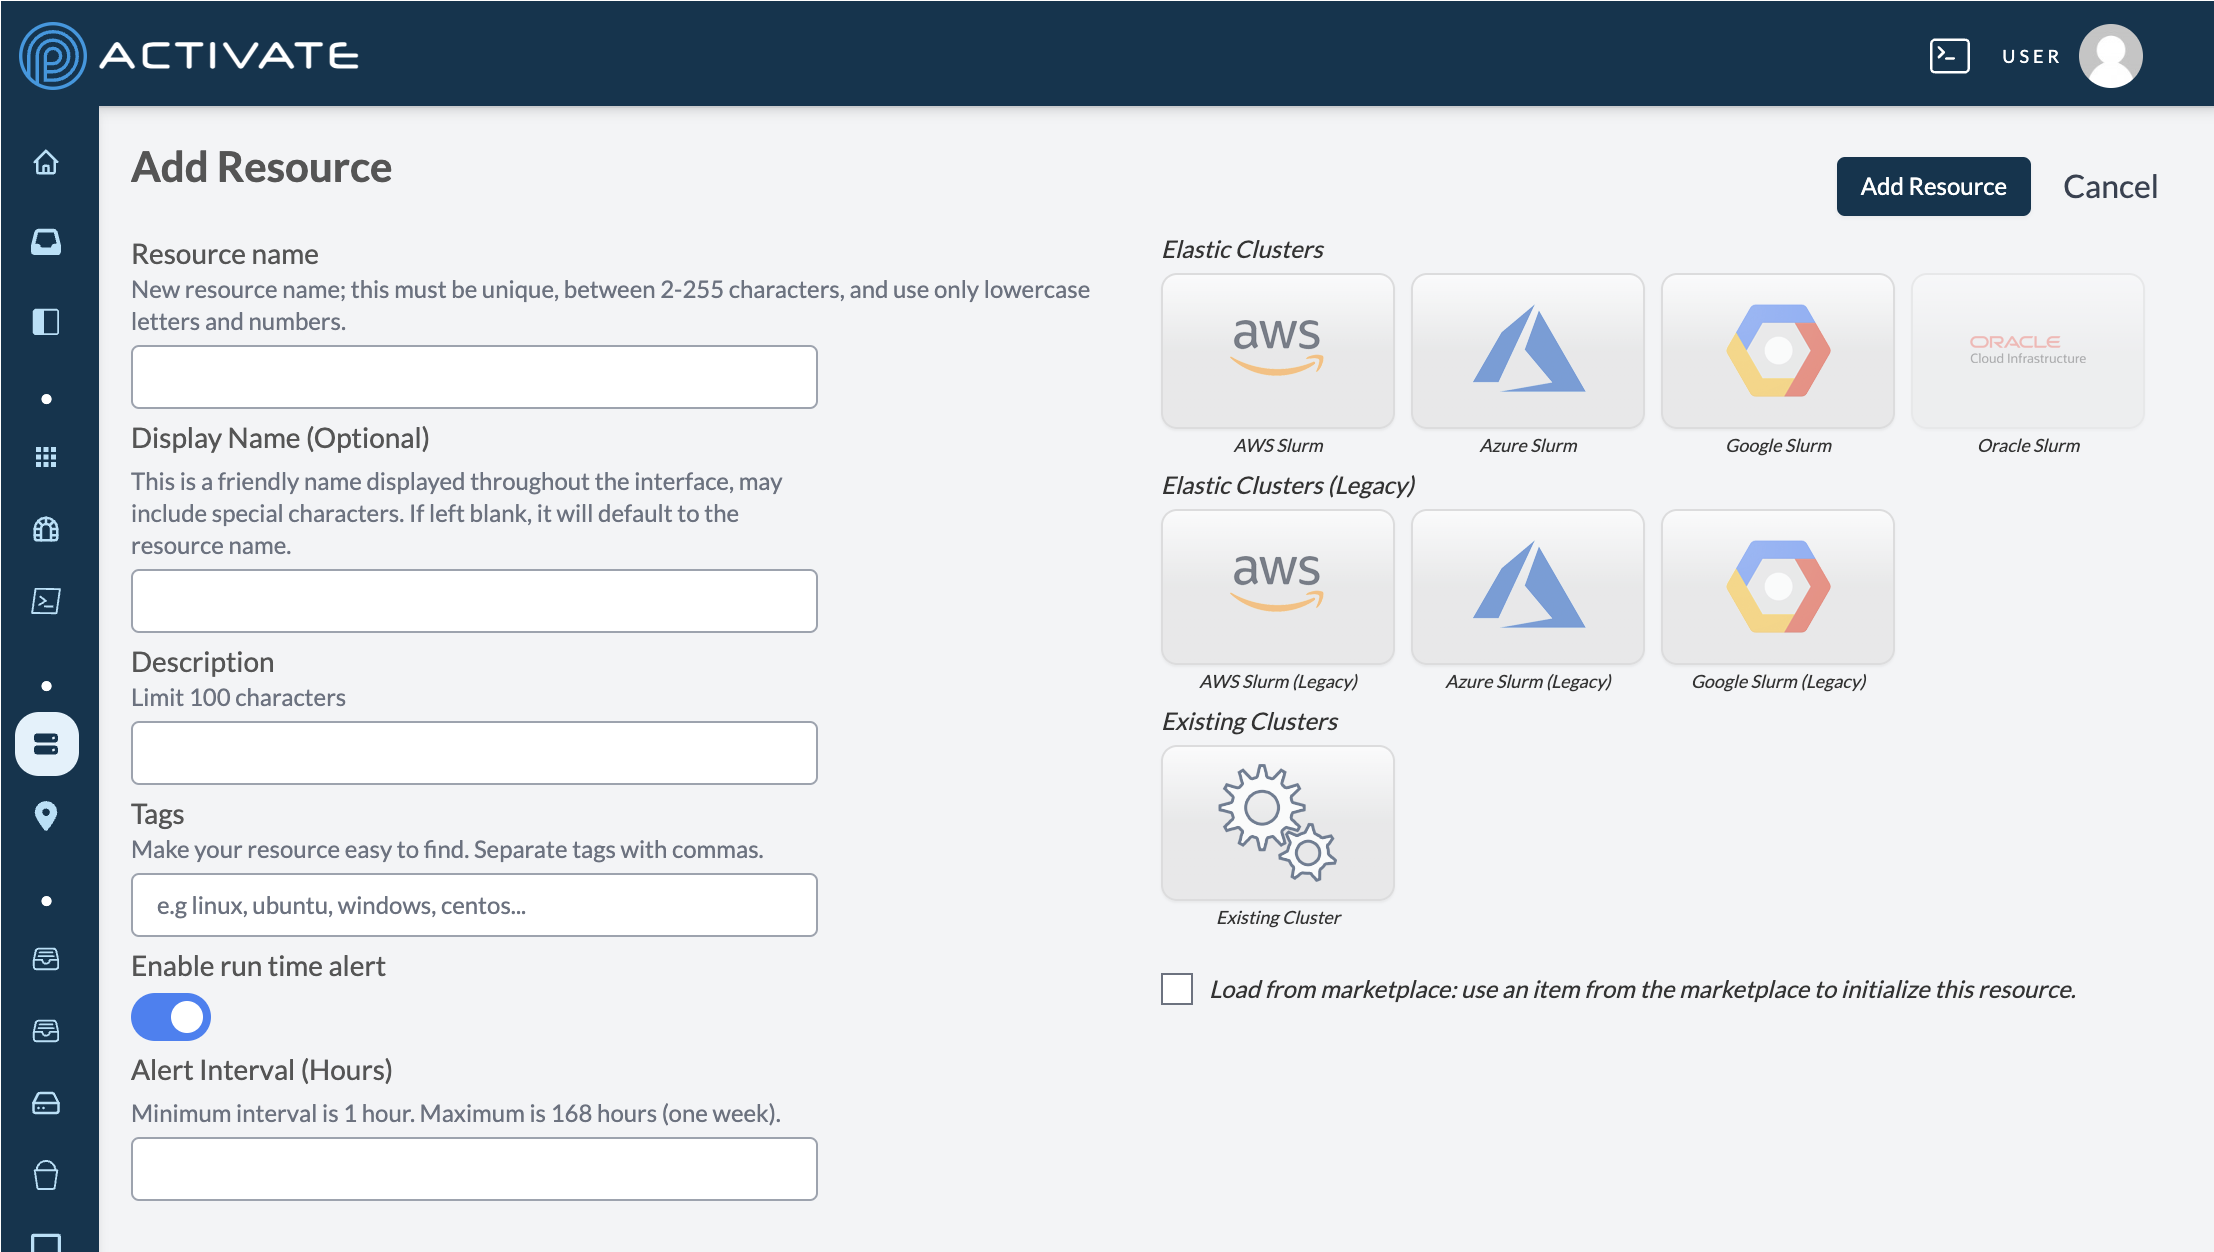
When you're ready, click Add Resource. Your resource creation will be confirmed on the next page with the message Resource created. You can configure your resource from this page. For more information on configuring clusters generally or what you need to configure clusters on specific CSPs, please see Configuring Clusters.
Your new cluster will also appear in the Computing Resources module on the Home page.
Which type of resource should I use?
If you’re creating a new resource, an elastic cluster is typically the best choice. Users who are familiar with Slurm will be more comfortable using elastic clusters instead of elastic pools. Additionally, newer ACTIVATE workflows run exclusively on elastic clusters. For these reasons, we consider elastic pools to be a legacy feature and discourage users from choosing them to create new resources.
The CSP you choose depends on your organization, workflow needs, and whether you already have a cloud account from a specific CSP. Otherwise, any elastic cluster is a good choice to start with.
How should I configure my resource?
If you’re simply testing resources or if your organization has not provided specific configuration settings for your project, we recommend using a configuration from the Marketplace. For more information, please see Configuring Clusters > Load From Market.